
Table of Contents
Introduction
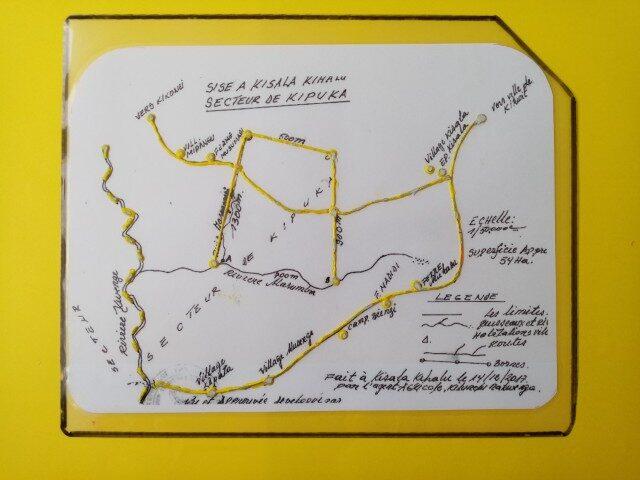
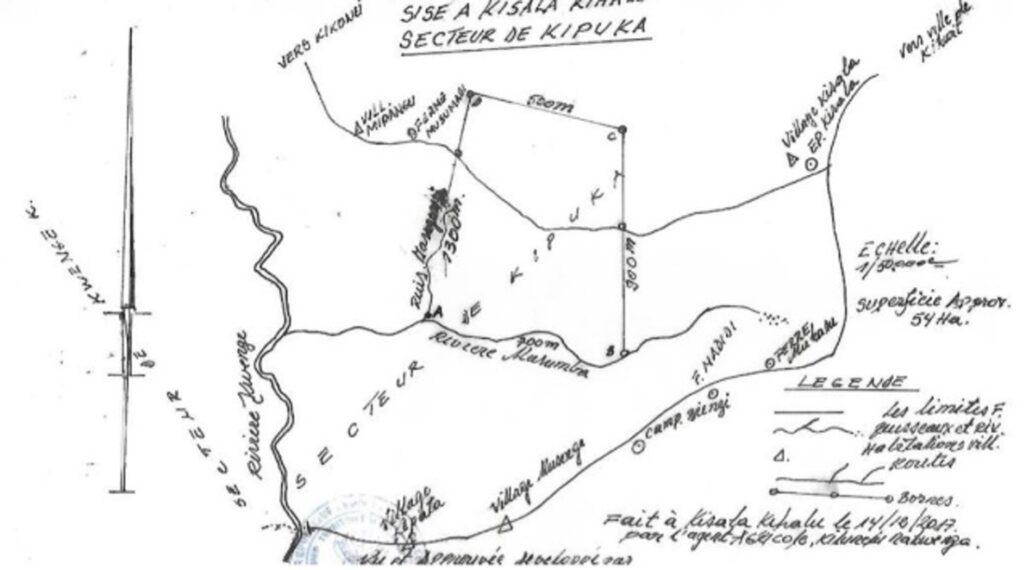
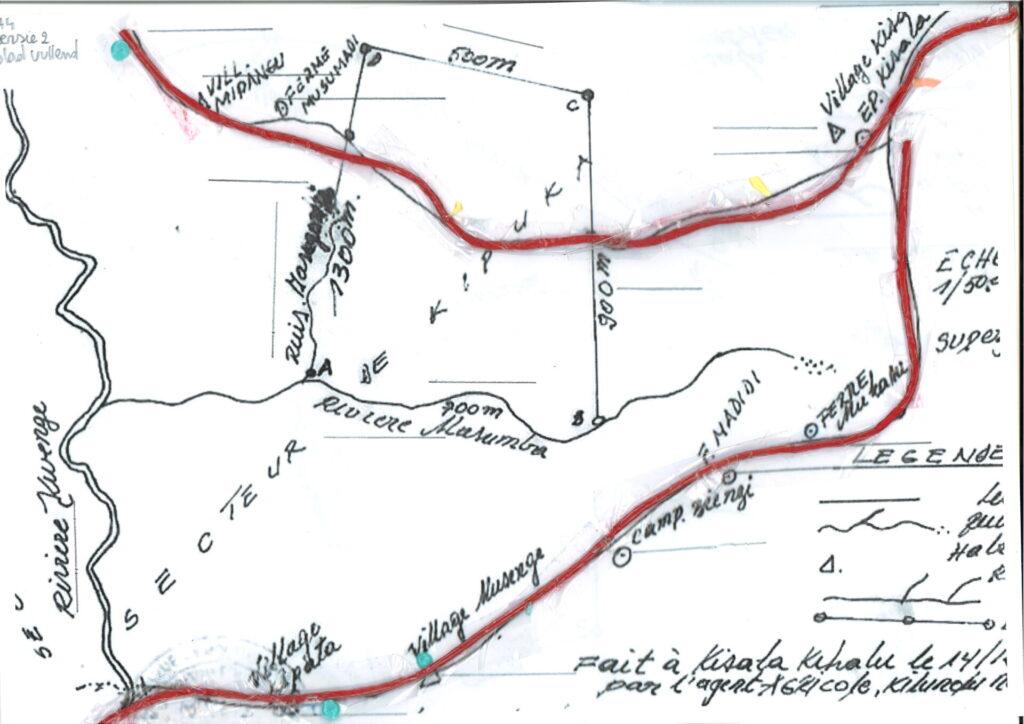
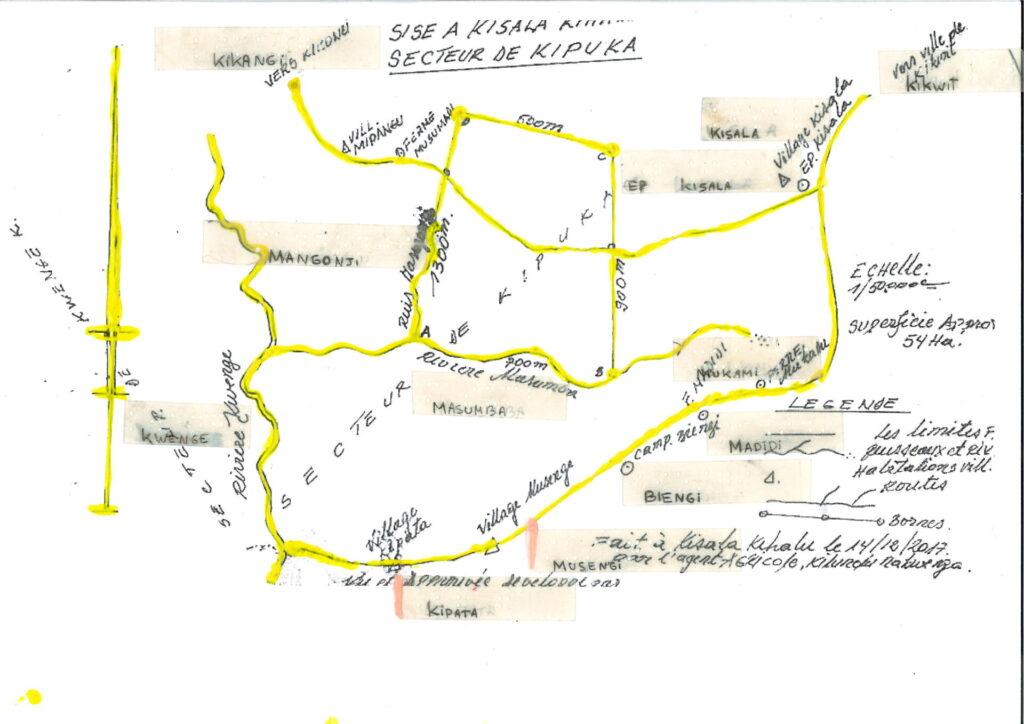
Through a colleague a question arrived at our makerspace. A blind client wants to revisit the area where she grew up in the near future. We’ll refer to this person as the user.
To help her understand the physical changes in the area during conversations with locals, she wants a tactile version of a hand drawn map as an aid. The map is not for navigation purposes.
Supplies
- Scissors
- Laminating machine
- A4 laminating sheets
- Polyvinylacetate based glue, also known as PVA based glue. We have good results with wood glue. This is a different consistency than crafting glue.
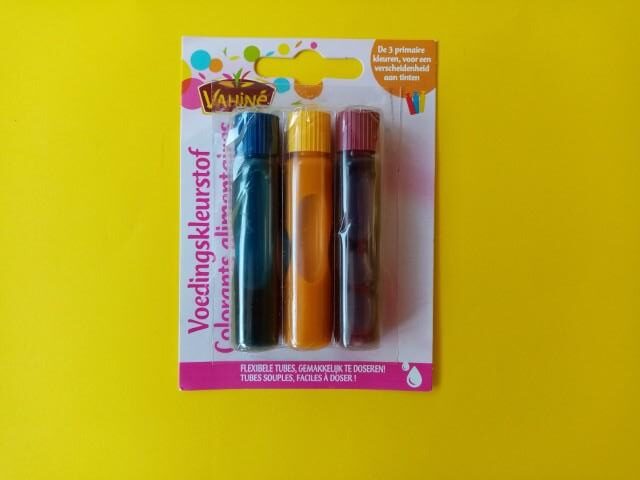
- If colouring the glue is relevant, any of the following three: Acrylic paint and an empty squeeze bottle, or a food colorant and an empty squeeze bottle, or a permanent marker.
- A black permanent marker with a thick tip
- An A4 sized map, or smaller
Making the laminated map
This video demonstrates how to make the laminated map. Do note that there is no audio included. A text version which is compatible with a screen reader is available below.
- The first step is to have a conversation about what makes the final product suitable for the user. This is the list of demands. In our case it was the following:
- All visual information of the hand drawn map remains.
- Tactile elements: points A B C D and the four lines connecting them, roads and rivers.
- A clear differentiation between roads and rivers
- The map is water resistant
- A marking to indicate the correct map orientation
- Low cost
- A4 size
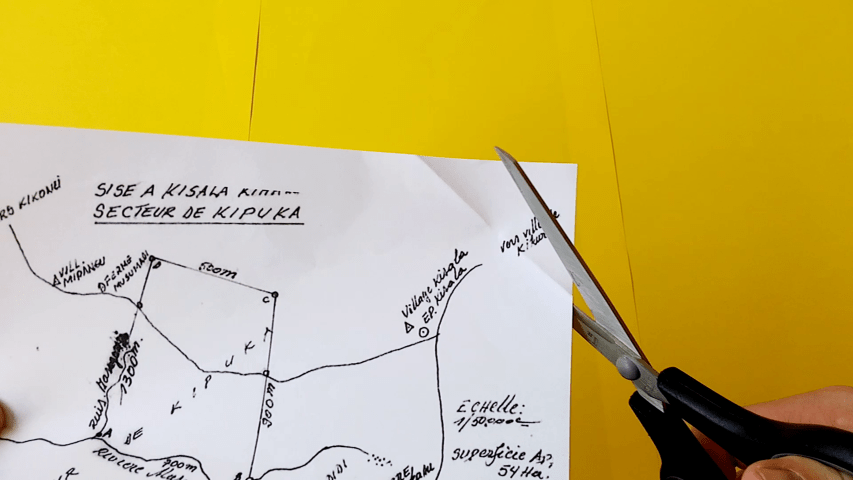
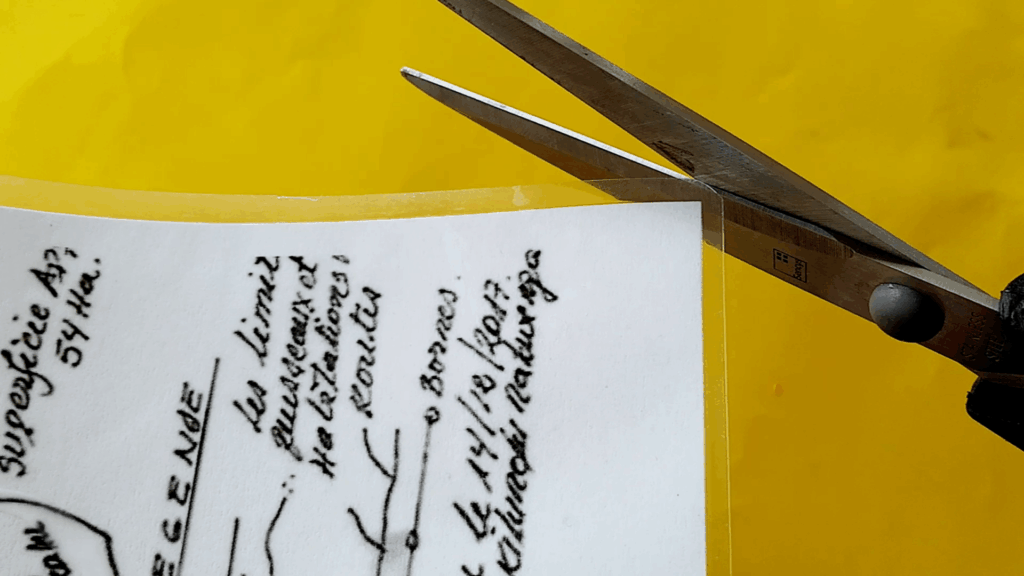
- Make a copy of the original map
- Agree with the user which corner should indicate that they are holding the map correctly. Make a 45 degree cut on this corner.
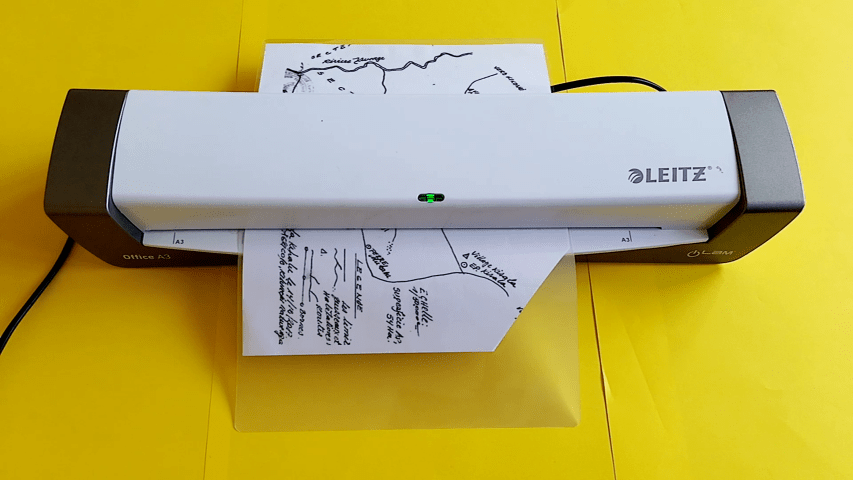
- Laminate the map
- Next to the previously made 45 degree cut, make a new cut. Pay attention that you don’t cut too close to the paper, because then the lamination might come loose.
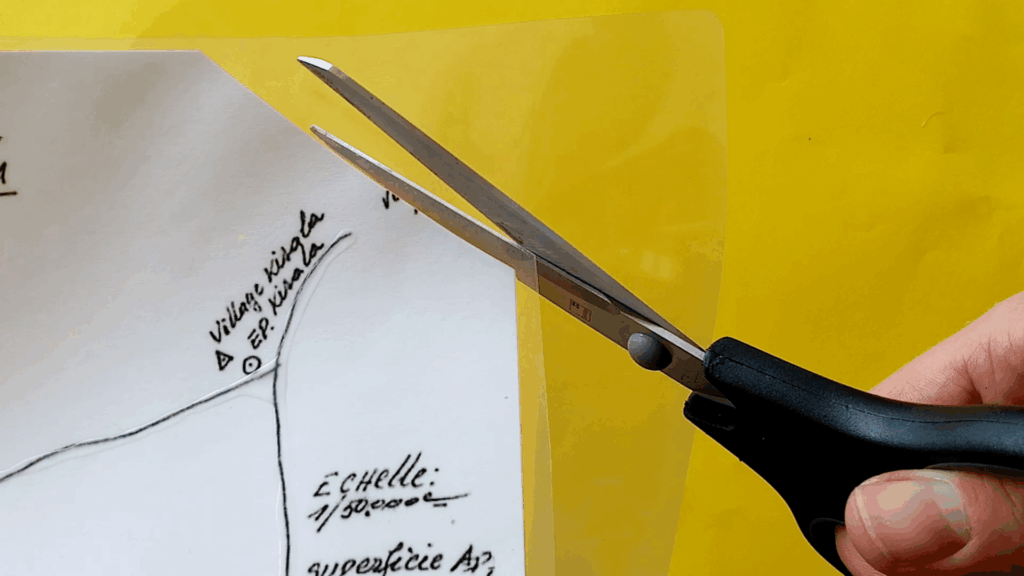
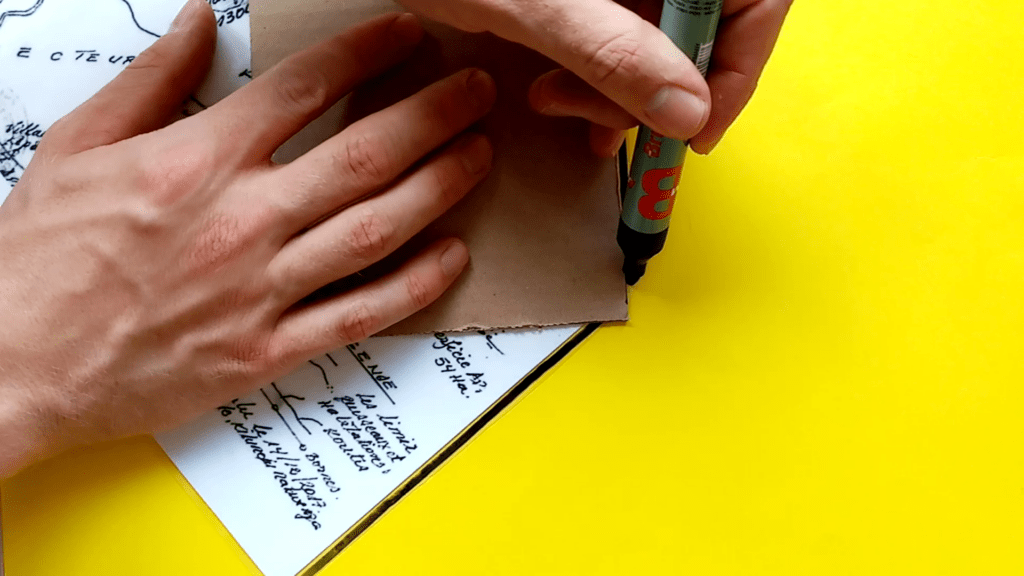
- Remove any sharp edges.
- Add a thick black line with a permanent marker around the edge of the map
- Contrasting glue preparation:
We used Polyvinylacetate glue, also known as PVA glue or wood glue. Do note that once dry it becomes transparent.If a contrasting glue is an advantage for your user because they still use their remaining vision, or for other people that will look at the map, then we can suggest three easy options.
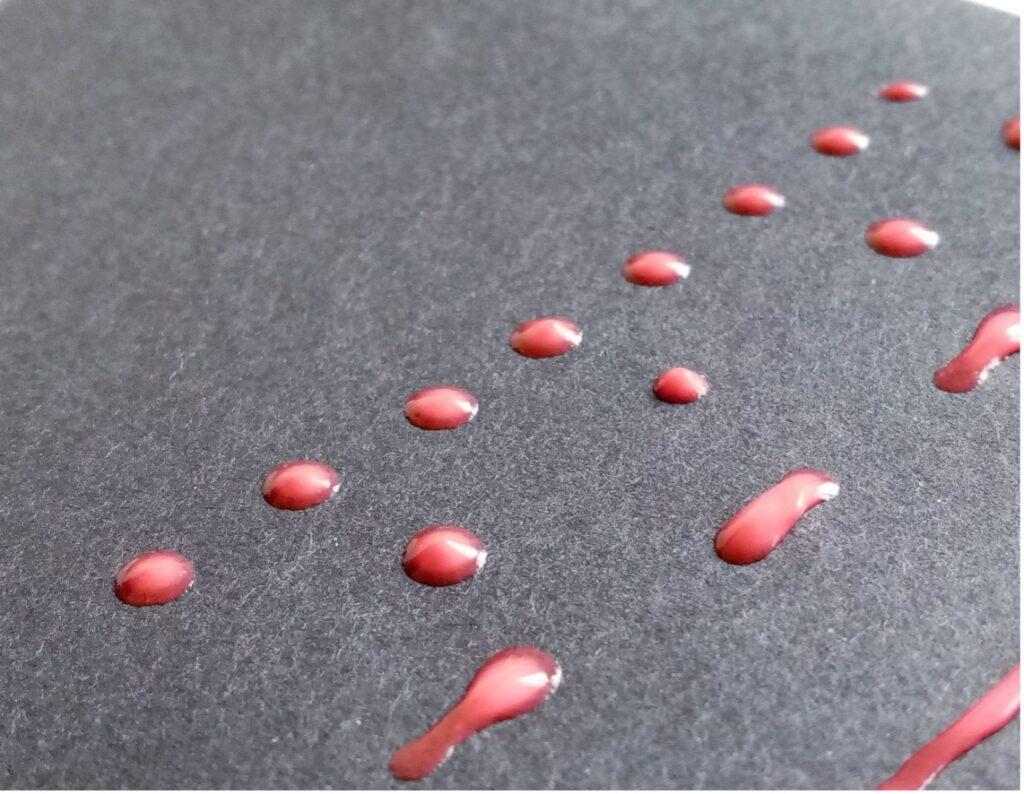
Make sure that the chosen colour and the paper are sufficiently contrasting for the user.- Option 1: Add acrylic paint to the glue. We advise that you maximally use the same amount of paint as glue. Shake or stir until all of the glue is coloured.
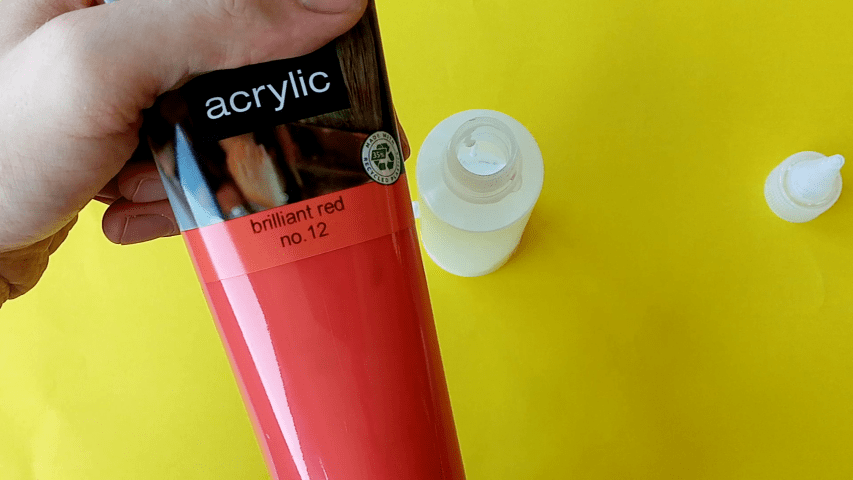
After mixing, the white of the glue will make the colour seem lighter. However, after drying it will look more like the paint.
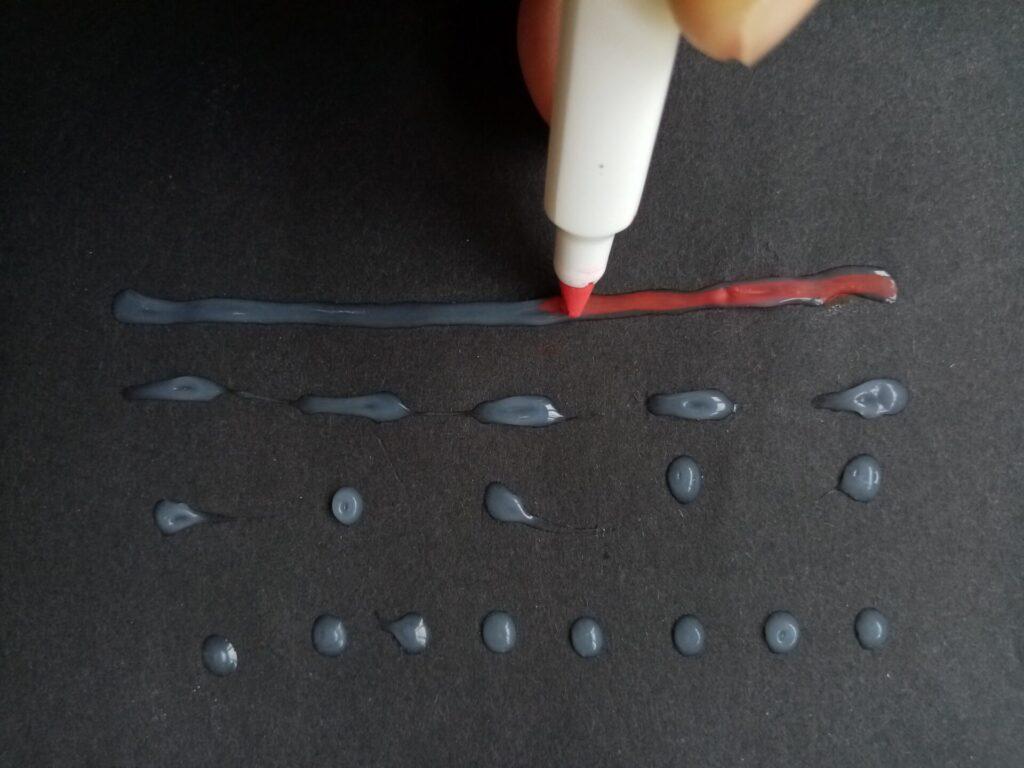
- Option 2: Once the glue is dry, use a permanent marker to colour the glue. Make sure that the colour of the permanent marker and the paper are sufficiently contrasting.
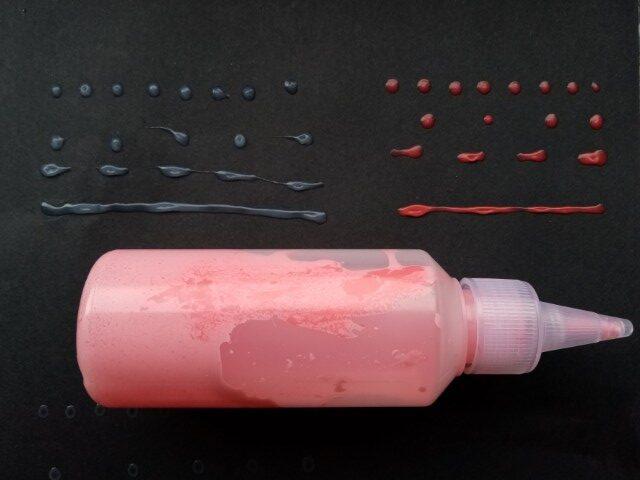
- Option 3: Use food colorant. Mix a couple of drops in the glue. Shake or stir until all of the glue is coloured.
Now that you’ve applied the glue you might notice that it shrank after drying. That’s normal. Test with the user if the glue height is still OK. If the glue is too flat, apply another layer or use a different PVA-based glue.
Adding flour to the mixture will works also. The quantity is based on the amount and type of glue. Start by adding a little amount and stirring.
- Agree with the user how to represent the tactile differences (dots, dashes,…). Do this on the backside of the laminated map. Let the user try and decide once the glue is dry.
- Drying the glue
Glue dries in two steps. First of all the outer surface becomes dry. At this point non-coloured glue became transparent, and you can gently touch it.
If you want to speed up the process of the glue becoming touchable:
- Use a hairdryer, half a meter away from the surface. Make sure that the map doesn’t fly away.
- Put the map on top of a radiator.
Secondly, the inside becomes dry. The glue is hard.
Depending on the quantity of glue it takes at least 24 hours. Wait for this amount of time before storing the map, for example in a backpack.
Testing with the user
Do note that previous tests with the user were made before we reached the shown result. This is documented in the following section Background information.
The user confirmed that her list of demands, see the previous step 1, was fulfilled. Meaning that this prototype is the aid which she was looking for.
Knowledge transfer
Before leaving the map with the user we explained the creation process. We’ve also shared this in a digital document. In case that damage occurs she is able to have it reproduced.
Extra
Curious about more information on using PVA glue? TactileImages.org created a webinar on using PVA glue to make drawings tactile.
After figuring out the best shape of the hand made map, it’s a good idea to make it more durable. Here are four alternatives to do so. Keep in mind that maps used for navigation purposes are often no longer used after a blind person learned a route.
- One of the methods is to replicate the map in 3D designing software, and 3D printing the map.
- A second method would be to laser cut the map in material of the same thickness as the hand made map.
- A third option can be the use of corrugated polypropylene sheets, which are comparable to cardboard, but waterproof.
- Tactile map generating platforms such as touch-mapper.org and hapticke.mapy.com are also available.
Critical thinking is essential: does the user want to learn a route, or do they want to know how their environment is built? For tactile maps aimed at learning a route, the replication of surroundings such as buildings is not an advantage for each user. Also, it’s not guaranteed that the output of the map making software fulfils the requirements of the user.
Background information
The following information is useful for people who are interested in the process that we went through before achieving the results shown above. Do note that this is only a small amount of the prototypes made for this project.
First test
Testing pre-made prototypes
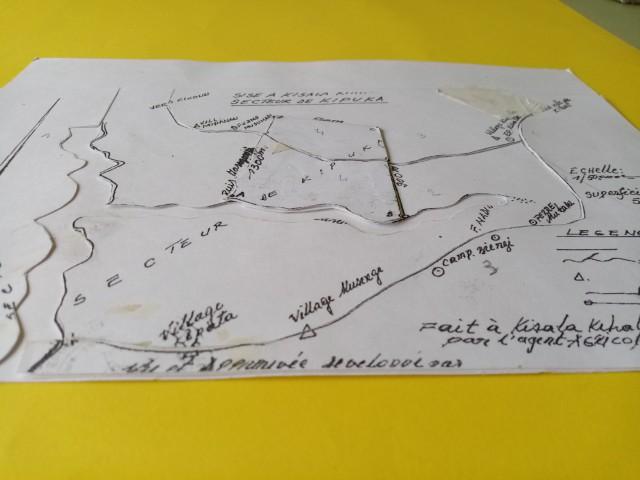
Before visiting the user we’ve received a copy of the map that she wants to have made tactile.
.
- Contrasting glue preparation:
We used Polyvinylacetate glue, also known as PVA glue or wood glue. Do note that once dry it becomes transparent.
If a contrasting glue is an advantage for your user because they still use their remaining vision, or for other people that will look at the map, then we can suggest three easy options.
Make sure that the chosen colour and the paper are sufficiently contrasting for the user.
- Option 1: Add acrylic paint to the glue. We advise that you maximally use the same amount of paint as glue. Shake or stir until all of the glue is coloured.
After mixing, the white of the glue will make the colour seem lighter. However, after drying it will look more like the paint.
- Option 2: Once the glue is dry, use a permanent marker to colour the glue. Make sure that the colour of the permanent marker and the paper are sufficiently contrasting.
- Option 3: Use food colorant. Mix a couple of drops in the glue. Shake or stir until all of the glue is coloured.
Now that you’ve applied the glue you might notice that it shrank after drying. That’s normal. Test with the user if the glue height is still OK. If the glue is too flat, apply another layer or use a different PVA-based glue.
Adding flour to the mixture will works also. The quantity is based on the amount and type of glue. Start by adding a little amount and stirring.
- Agree with the user how to represent the tactile differences (dots, dashes,…). Do this on the backside of the laminated map. Let the user try and decide once the glue is dry.
- Drying the glue
Glue dries in two steps. First of all the outer surface becomes dry. At this point non-coloured glue became transparent, and you can gently touch it.
If you want to speed up the process of the glue becoming touchable:
- Use a hairdryer, half a meter away from the surface. Make sure that the map doesn’t fly away.
- Put the map on top of a radiator.
Secondly, the inside becomes dry. The glue is hard.
Depending on the quantity of glue it takes at least 24 hours. Wait for this amount of time before storing the map, for example in a backpack.
Testing with the user
Do note that previous tests with the user were made before we reached the shown result. This is documented in the following section Background information.
The user confirmed that her list of demands, see the previous step 1, was fulfilled. Meaning that this prototype is the aid which she was looking for.
Knowledge transfer
Before leaving the map with the user we explained the creation process. We’ve also shared this in a digital document. In case that damage occurs she is able to have it reproduced.
Extra
Curious about more information on using PVA glue? TactileImages.org created a webinar on using PVA glue to make drawings tactile.
After figuring out the best shape of the hand made map, it’s a good idea to make it more durable. Here are four alternatives to do so. Keep in mind that maps used for navigation purposes are often no longer used after a blind person learned a route.
- One of the methods is to replicate the map in 3D designing software, and 3D printing the map.
- A second method would be to laser cut the map in material of the same thickness as the hand made map.
- A third option can be the use of corrugated polypropylene sheets, which are comparable to cardboard, but waterproof.
- Tactile map generating platforms such as touch-mapper.org and eu are also available.
Critical thinking is essential: does the user want to learn a route, or do they want to know how their environment is built? For tactile maps aimed at learning a route, the replication of surroundings such as buildings is not an advantage for each user. Also, it’s not guaranteed that the output of the map making software fulfils the requirements of the user.
Background information
The following information is useful for people who are interested in the process that we went through before achieving the results shown above. Do note that this is only a small amount of the prototypes made for this project.
First test
Testing pre-made prototypes
Before visiting the user we’ve received a copy of the map that she wants to have made tactile.
.
We often receive questions to make tactile maps. There were three new methods waiting to be tried out with a user, so we took advantage of the situation and made three prototypes. Making prototypes before having the list of demands of the user is something which we normally don’t do, because it can be a waste of time.
Before sharing the prototypes we informed the user that we need her honest opinion on positive and negative aspects.
Both tactile map 1 and tactile map 2 have the same feedback:
- Positive that it’s rigid, which is an advantage in windy situations. One of the corners is cut-off, this indicates in which direction to hold the map.
- Negative:
- The cut-out marking for the river is difficult to feel. The user prefers a raised surface.
The various height differences have a negative impact on the user’s overview of the map
The user’s list of demands
During the first visit the user’s list of demands were clarified:
- All visual information needs to remain. This helps locals during the conversation with our user.
- Tactile elements: points A B C D and the four lines connecting them, roads and rivers.
- Tactile markings on one height level
- A clear differentiation between roads and rivers
- The map has to be water resistant
- A marking in the corners to indicate the correct map orientation
- A4 size is preferred rather than A3
- If larger than A4, has to be foldable
- Low cost, no specific amount mentioned
- 25 Words which have to be present in braille are specified.
The user’s past experiences with tactile maps
During the first conversation we asked the user about past positive and negative experiences with tactile maps.
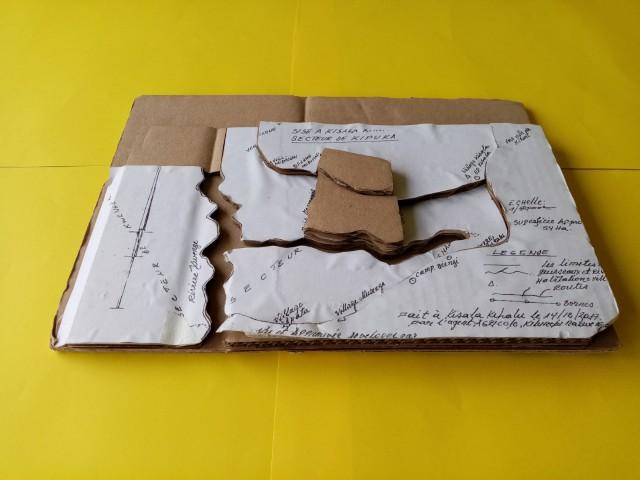
This is a cardboard map of her neighbourhood made by one of our colleagues. It was used during the mobility training.
The main road and sideroads are easy to distinguish: The main road is indicated in foam, and sideroads with glue. For her the coloured glue has no advantage. A small forest is marked with fabric. The school where her kids go to has the entrance marked with two push pins. The material isn’t waterproof, but the tactile elements are easy to differentiate.

The user also proposed her question to a teacher in her school, who produced a map with swell paper. Unfortunately all of the ink has raised. It’s difficult to navigate because the lines feel the same.
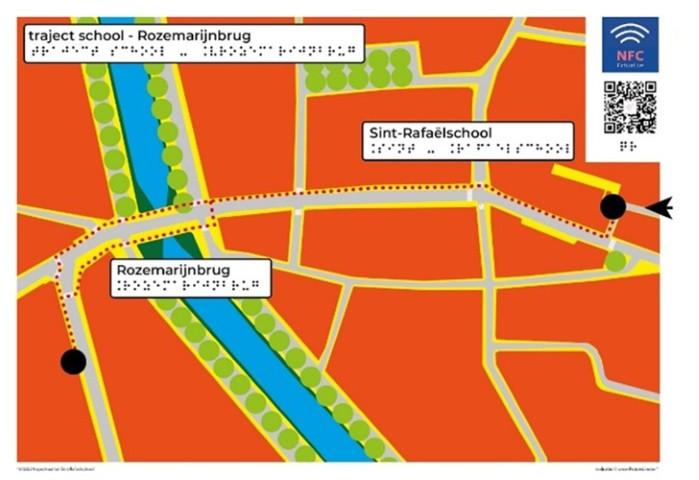
The school where goes to has a tactile map of the city. For her there is a clear difference between the dots and dashes. The technique is 2,5D flatbed printing. The braille is of good quality and the material is waterproof. Unfortunately the creation of this map requires software knowledge, and would cost more than what the user is willing to pay.
Second test
This time we return to test a couple of prototypes based on the user’s list of demands. It’s important that the user is made aware of the fact that together we are looking for solutions which meet all of the demands. However, at this point it is normal that not a single prototype meets all of the demands.
To prevent disappointment we make clear to the user which part of the demands we are testing. In this case:
- The location of braille
- The size of the map
- The differentiation between roads and rivers

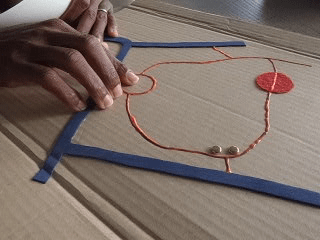
A selection of positive and negative experiences: The rivers are distinguishable and the braille markings are placed OK. Unfortunately the A3 size makes it difficult for the user to build a mental map.
A selection of positive and negative experiences: Some parts of the whitespace around the image of the map have been removed and printed on A4 paper. This causes enlargement of the map compared to tactile map 6. Unfortunately this makes it challenging to build a mental image of the map.
A selection of positive and negative experiences:
The user likes the A4 size. The glue marking is cheap and effective. The lamination is a cheap and effective method to have a waterproof map.
Depending on how you hold it it’s flexible or rigid. Unfortunately the braille markings are very close to each other. They make it challenging to build a mental image of the map.
Change of the list of demands
At the end of the second visit the user realized that the addition of braille makes it challenging to build a mental image of the map. The main importance is that she gets an idea of the geography. We tested a tactile map without braille, and it was clear that the user remembers all of the names. A4 format is sufficient.
The instruction on how to make this final map are shared above.
