Table of Contents
What is support?
FDM printing involves printing thin layers one on top of the other. A polymer filament is heated, making it more fluid and once the nozzle has placed it in the right location it hardens. Theoretically, if several layers are printed and the subsequent layer is slightly bigger than the layer before, gravity will pull the melted polymer towards the build plate. If this repeats over several layers the model on the build plate will look messy and will most likely fail.
To prevent this from happening you can add a structure to your model in your slicer program which you then remove after your print is complete. Since it supports certain layers, this is referred to as a support structure or just ‘support’.
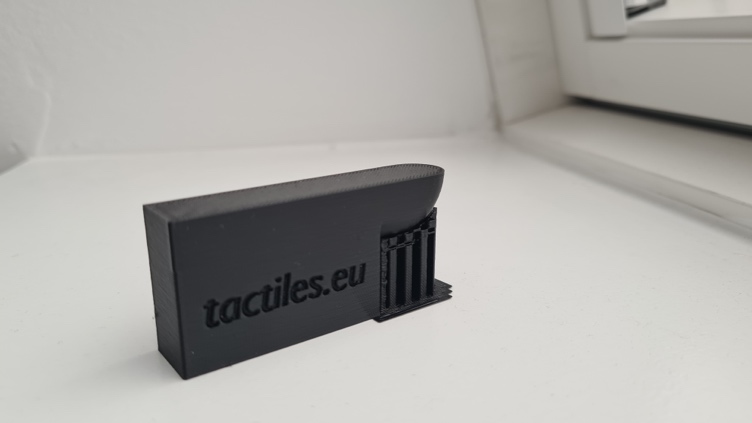
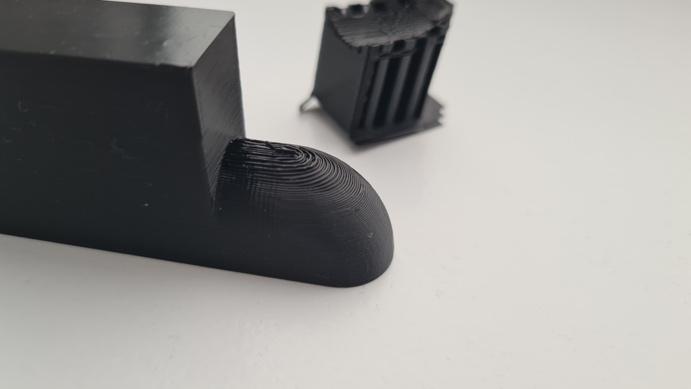
Using support has many advantages because it allows you to print difficult, irregular or organic shapes, but it also has some disadvantages, for example it can leave marks on your 3D print, which can in turn cause an unwanted and even unpleasant tactile experience. In general we advise avoiding the use of support structures if possible.
Designing
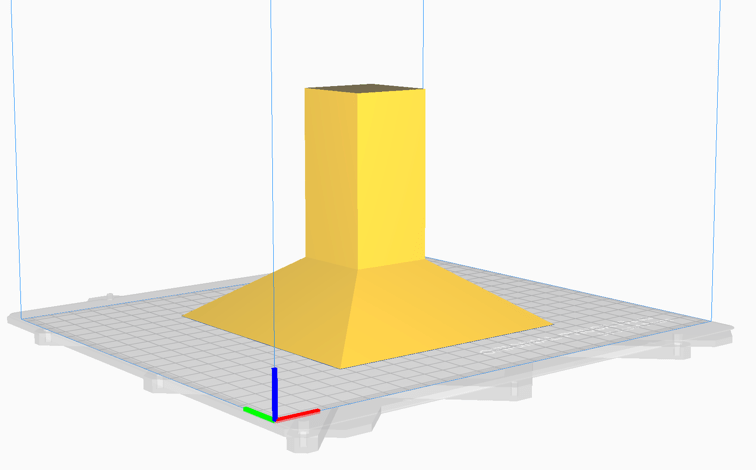
As you can probably imagine, some issues can be avoided by having well-designed models. Support is theoretically needed if the angle in the z-direction is more than 45 degrees. If the angle is 45 degrees or less, every layer is still supported by the layer underneath. Some printers are able to print a couple of degrees more without loss of quality, but 45 degrees is a good rule of thumb.
With this in mind, you can try to avoid using angles of 45 or more in parts of a model if the angle has no functional reason to be bigger. There is also the possibility of printing areas that have a 45 degree overhang or more with reduced layer height. This can avoid an additional support structure. The printing orientation is also important. If you have parts sticking out of the model to the side at an angle of 90 degrees it can help to use a chamfer or fillet to reduce the 90 degree angle.
Printing orientation
As you can imagine, it also matters in which direction the part with the overhang is placed while preparing the print in the slicer program. If it was not possible to position the model in the right direction while drawing it, you can change the direction of the model in your slicer program. You are then choosing the best orientation of the print to avoid adding support.
Adding support in a slicer
If none of the tips above apply to your model, you will have to add a support structure. Different slicer programs have different options for using support, but most options are very similar.
In Cura you can check the “Generate support” box in the settings and the options will be available to select.
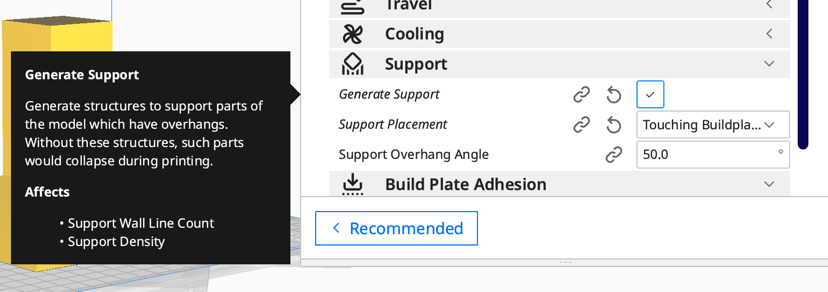
First choose what kind of support placement you want: only add support material where the overhang is above the build plate or everywhere an overhang is detected. Then choose the threshold for overhang detection. 3D printers are able to print overhangs up to 45 degrees or a bit more.
There are lots more settings you can edit like infill and speed settings for support material, but those are for more advanced use.
In most cases you have the option to either apply support to every part of the model or only parts that are overhanging the bed. In some situations this is sufficient to get a good quality print. In any case you can set the threshold above which the support will be added by the slicer. This will usually be at or around 45 degrees by default, but you can tweak this to get the best result.
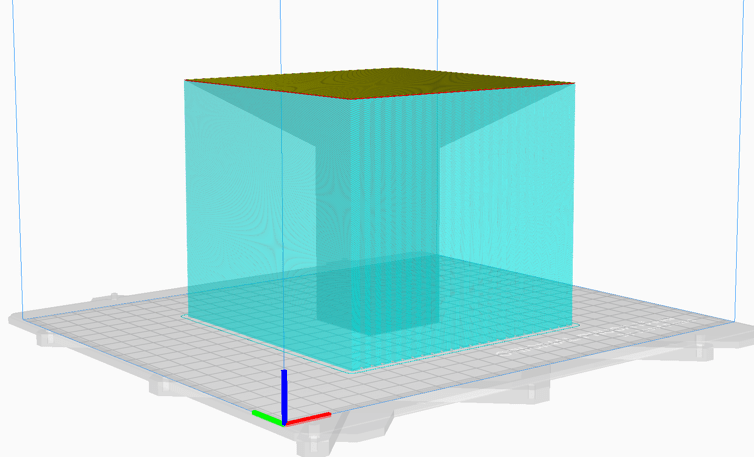
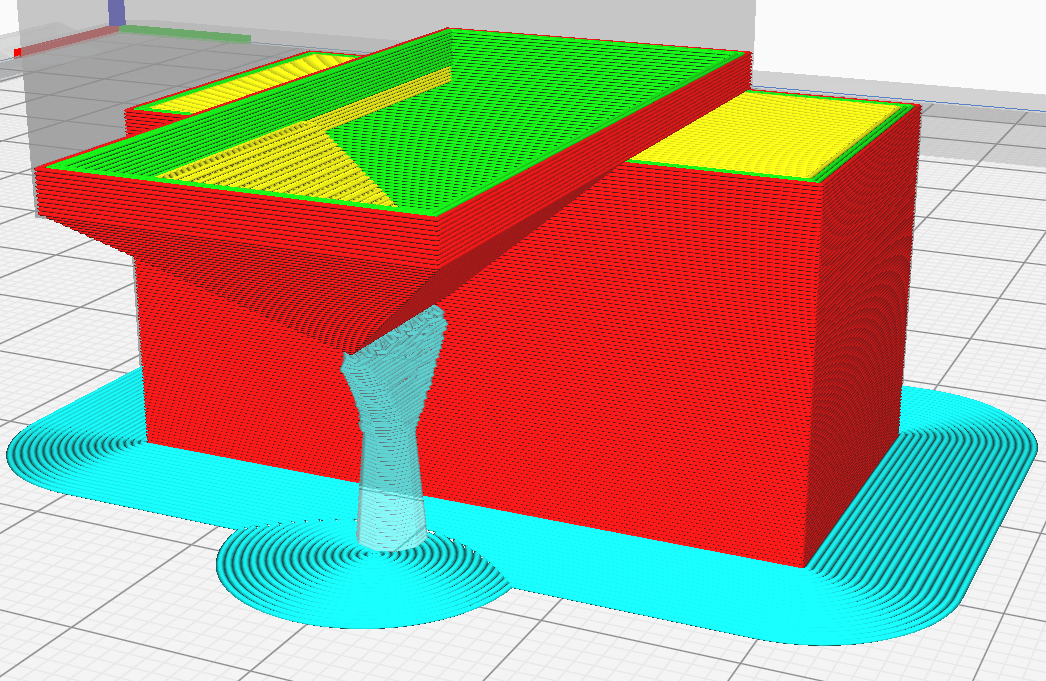
In most cases the slicer will help you in some way by notifying you that there are parts with overhang in the model. Many slicers have a preview option to see what your slice looks like and it is often colour-coded. Overhanging elements have their own colour code in preview mode.
The general settings in most slicers are not that sophisticated. Most of the time you only have the following options: apply support to parts overhanging the build plate; apply support to all parts, or; do not apply support. Cura also has features where you can personalise your options. In Cura you can add blocks that act as a support blocker, meaning that parts inside the virtual blocks you add to a model don’t get support assigned to them. This can help you get cleaner models without unnecessary support structures.
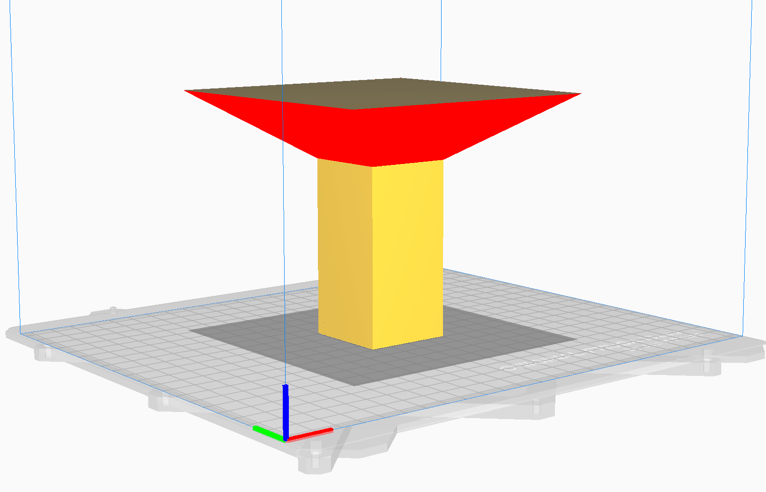
Some slicers have the option of making an object printable by extending overhangs towards the print bed, if necessary, so that a support is no longer required (the “Make Overhang printable” feature). The extension in the direction of the print bed reduces the angle to the maximum printable value (usually 45°). The object is sometimes changed in the process; in the example shown, the flat surface becomes an inverted roof. This is of course not optimal; in many other cases the change is hardly noticeable.
Support material (PVA)
If you have access to a 3D printer with dual or multiple extrusion, using multiple materials at the same time, there is a method you can use to get cleaner results. This method is based on using Polyvinyl Alcohol (PVA) for the support structure. The structure for your 3D model is printed in PLA or ABS. Because PVA reacts to water very quickly, you can later dissolve the PVA support structure by leaving it in a water bath for a period of time, producing a clean PLA/ABS model. A roll of PVA filament is about 15-20% more expensive than PLA filaments.
A disadvantage of PVA is that it is hydrophilic and therefore must be protected from moisture, otherwise, it can quickly become unusable or must be recycled by drying. There are other filaments that can also be easily detached from PLA, for example Ultimaker Breakaway. The disadvantage of this support material is that it must be mechanically removed from the printed object, which can be impossible depending on the structure of the object (for example, in cavities).
Written by: Evert Rasing