
Unfortunately, it’s not possible to select a braille font in Tinkercad in order to label the model with the text tool directly. However, there is a workaround which, with some practice, can give a good result in an acceptable time.
Creation of braille letters using hemispheres
Goal: A full cell is created (6 or 8 braille dots possible), which is duplicated as many times as the word has letters. Then, for each letter, the dots that are not needed are deleted.
1. Drag a hemisphere from the shapes in the right-hand menu onto the drawing area.

2. Change the dimensions of the length and width to 1.5mm.

3. Change the height of the hemisphere to 0.7mm.

4. Duplicate the finished braille dot with the shortcut CTRL+D (or Duplicate icon). Move it in the x-direction by 2.5mm. We recommend you change the “snap grid to 0.5mm. The default is 1mm, so changing the increment of movement must always be done by typing decimal numbers.

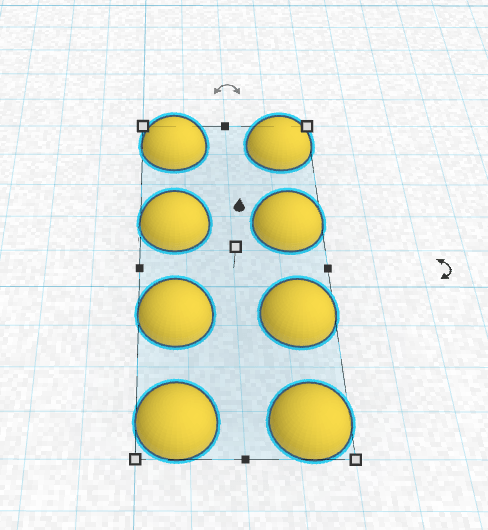
5. Duplicate the finished braille dot to create a grid of 2×4 dots for 8 dot braille (or 2×3 if 6 dot braille is being used). Hint: if you duplicate the first 2 dots with your keyboard, you can duplicate the next 2 lines simply using the shortcut CTRL+D.

6. Group the full cell you have created using the shortcut CTRL+G (or Group icon).
7. Move the braille cell to the object to be labeled.

8. Duplicate the full cell as many times as the word has letters. Move it 7mm in the x-direction each time . You can use the same hint as above: duplicating using the shortcut CTRL+D simplifies the workflow.

9. Select the full cells and ungroup them using the shortcut CTRL+SHIFT+G (or Ungroup icon).

10. Delete unnecessary dots to form the desired letters.

11. Export the finished model as an STL file.

