
This tutorial is based on the latest free version of Sketchup (Sketchup Make 17.2.2555 64bit).
Preliminary work
To create braille with Sketchup the font Euro-850 must be installed. This can be downloaded here free of charge.
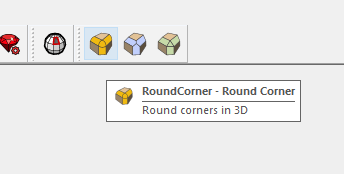
The plugin “round corner” must also be installed. The easiest way to do this is via the extension warehouse directly in Sketchup. The plugin LibFredo6 should also be installed. LibFredo6 is a shared plugin library used by lots of plugins. It enhances plugins with generic capabilities such as default parameters, language translation, checking plugins for updates, trace logging, etc.
For more information and to download, visit:
https://sketchucation.com/plugin/1173-roundcorner
https://sketchucation.com/forums/viewtopic.php?f=323&t=17947
It also makes sense to install the plugin “Remove Inner Faces”. With the help of this plugin, inner walls can be deleted with one click. By hand this process takes much longer. Please note: the plugin does not work for all geometries, but is absolutely safe for braille.
For more information and to download, visit:
http://sketchucation.com/forums/viewtopic.php?p=91814%23p91814
Inserting braille
Step 1
Select the “3D text” tool

Step 2
Insert the desired text. Select the font Euro-850.
The following parameters are important:
height 9.5mm (the diameter of a dot will then be ~1.5mm)
extruded 0.7

Step 3
Click on Place and place the braille in the desired position. Click again to place.

Step 4
Click on the braille with the right mouse button and select “break up into individual parts”.

Each cylinder is now selectable as a separate object.

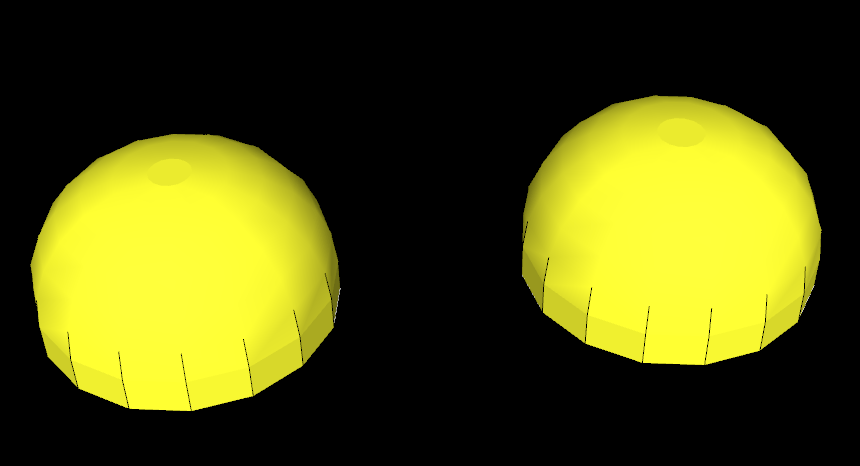
Please note: Steps 5 to 8 are not absolutely necessary. Braille in the form of cylinders can also be printed successfully. However, the rounded braille dots look more similar to the braille modules on a braille display. Even though some inexperienced readers preferred the sharp-edged cylinders in the survey, we recommend the rounded version.
Rounding braille
Step 5
Click on another place with the mouse so that cylinders are no longer selected. Then start RoundCorner.
Step 6
Set the offset value to 0.7 and the segments to 10.

Click on some of the top surfaces of the cylinders. Depending on the performance of the computer, be careful not to select too many at the same time, otherwise the computer may crash. As a rough guide, 10 points should be adequate.

Step 8
To round the cylinders to hemispheres, click on “Generate Geometry”.

Removing the inner walls
Step 9
Between the hemispheres and the outer skin of the actual model there is now a wall that must be removed. This can be done with the plugin Remove Inner Faces with one click. The plugin can be found in the menu item “Extensions”. Please note: no confirmation is given of the removal of the partition wall. To be sure, simply take a look at the model using the “Section plane” tool.
