Table of Contents
As you can probably imagine, using colour in your 3D prints can increase its visual appeal. Different types of filament are available in various standard colours and if you cannot find the exact colour you are looking for, you can even let a manufacturer mix the precise colour you need if you want. So in theory, the colour of your 3D print can be exactly the colour you want. Using colours does not benefit non-sighted learners. However, the use of contrasting colours can benefit students with low vision and can help them distinguish different parts of the model.
Ideally, if you are using a different colour to communicate certain information in a model for a student with low vision, you should also provide a tactile reference for the non-sighted learner. For information about textures, see article 4.4 Surfaces and textures.
If you are looking for guidelines on painting your print, please go to article 7.3 Painting.
Contrast
If you choose to use different colours in a 3D print for students with low vision, it is best for them to use high contrast colours. Also bear in mind the implications of colour blindness if relevant. Colour combinations to avoid include:
- red and green
- green and brown
- green and blue
- blue and grey
- blue and purple
- green and grey
- green and black
Bright colours e.g. yellow and orange are generally easier to see. White or bright yellow contrasted with black usually provide the highest colour contrast. Also it is best to avoid too much pattern and to limit the number of colours. Different colours should only be used where necessary to highlight key features.
You can find different tools online to help you choose the best contrasting colours for your model. An example is this site: https://accessibleweb.com/color-contrast-checker The tool is based on the colours as shown on the colour wheel below.
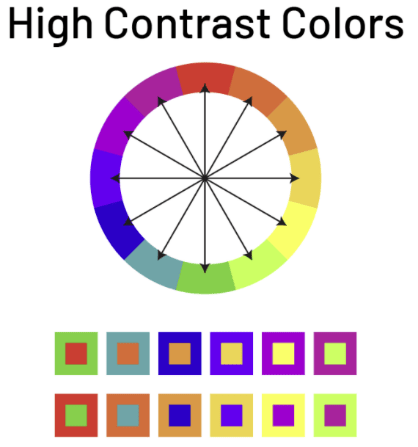
The idea of this wheel is that colours located opposite each other on the wheel are high contrast.
Dual extruder
If you want to make a multicoloured 3D print you have multiple options, depending on the type of 3D printer you are using and whether it has a dual extruder or a single extruder.
By using a printer with a dual extruder you can achieve very attractive 2-colour printed results.
This process requires some extra steps during the modelling and slicing process.
Modelling
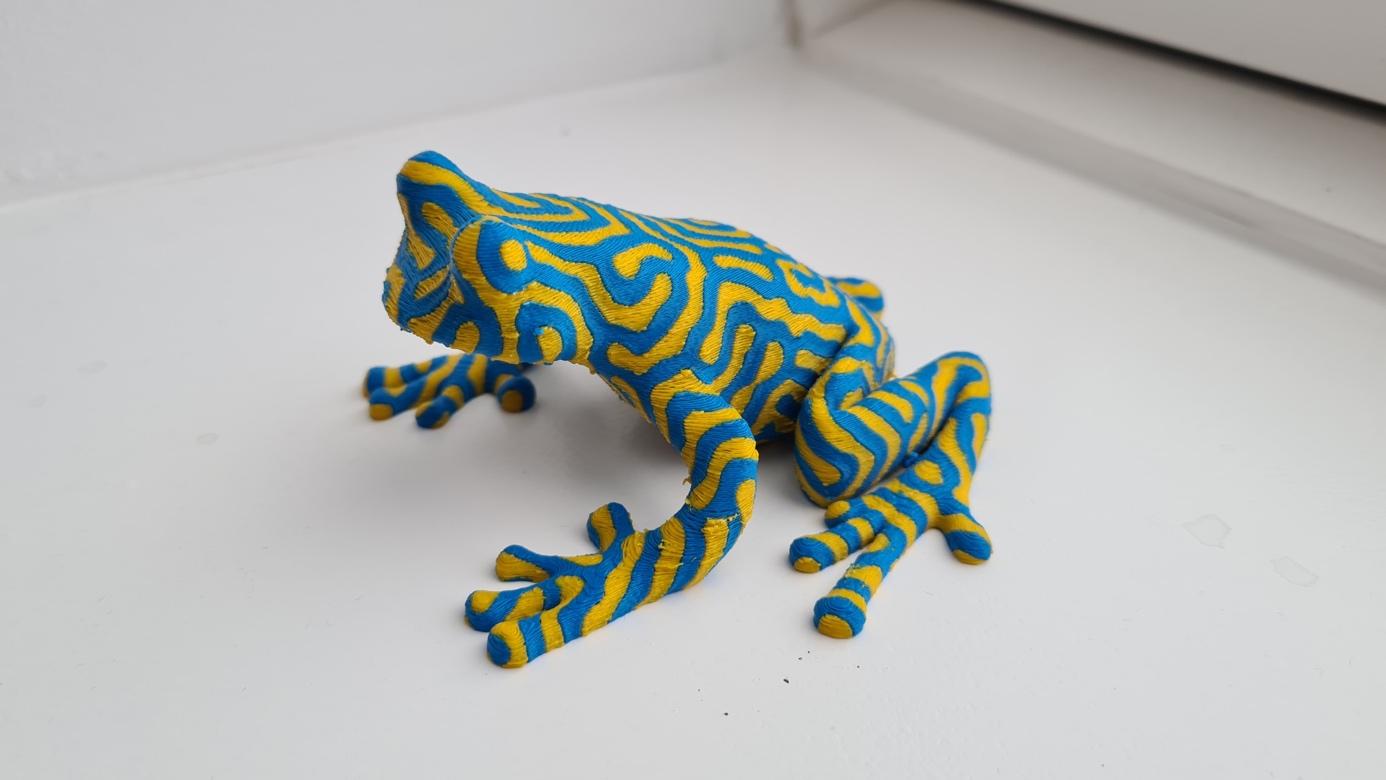
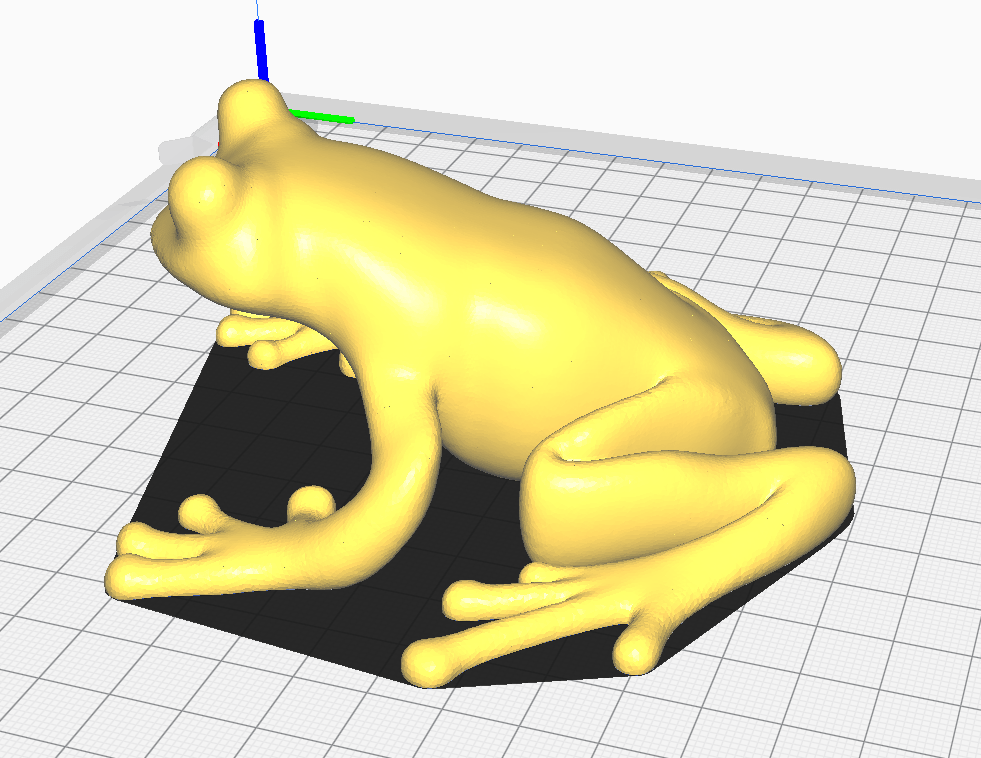
First of all, you will need to design an STL file for each of the colours you want to have in the model because later in the slicing process you can only apply a colour to an individual STL file. For the frog example you will need two submodels: one for the yellow and one for the blue lines. The STL files will look like this:
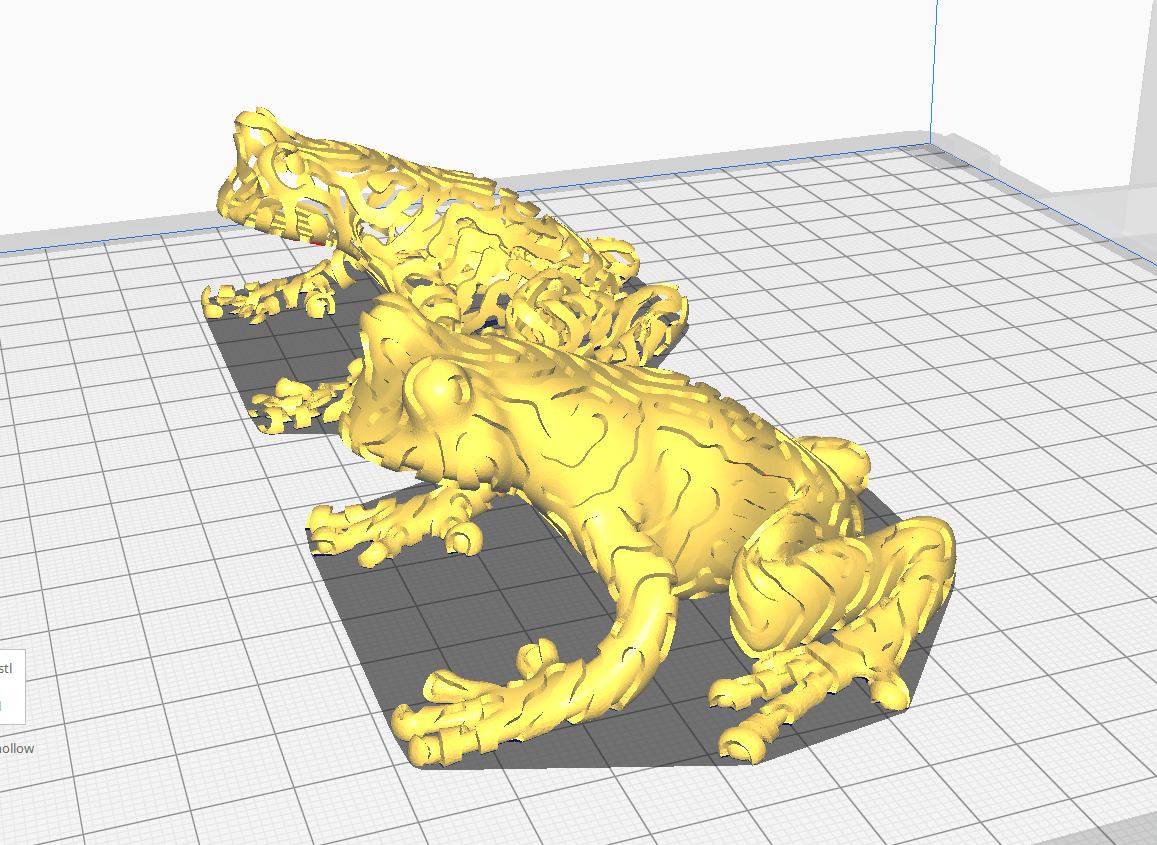
The frog at the back is for the yellow lines and the frog at the front is for the blue lines.
Slicing
The next step is to assign the extruder with the yellow filament to the model at the back and the extruder with the blue filament to the model at the front.
After this, you should apply the “merge” option. Every slicer should have a ‘merge’ option or a similar menu item.
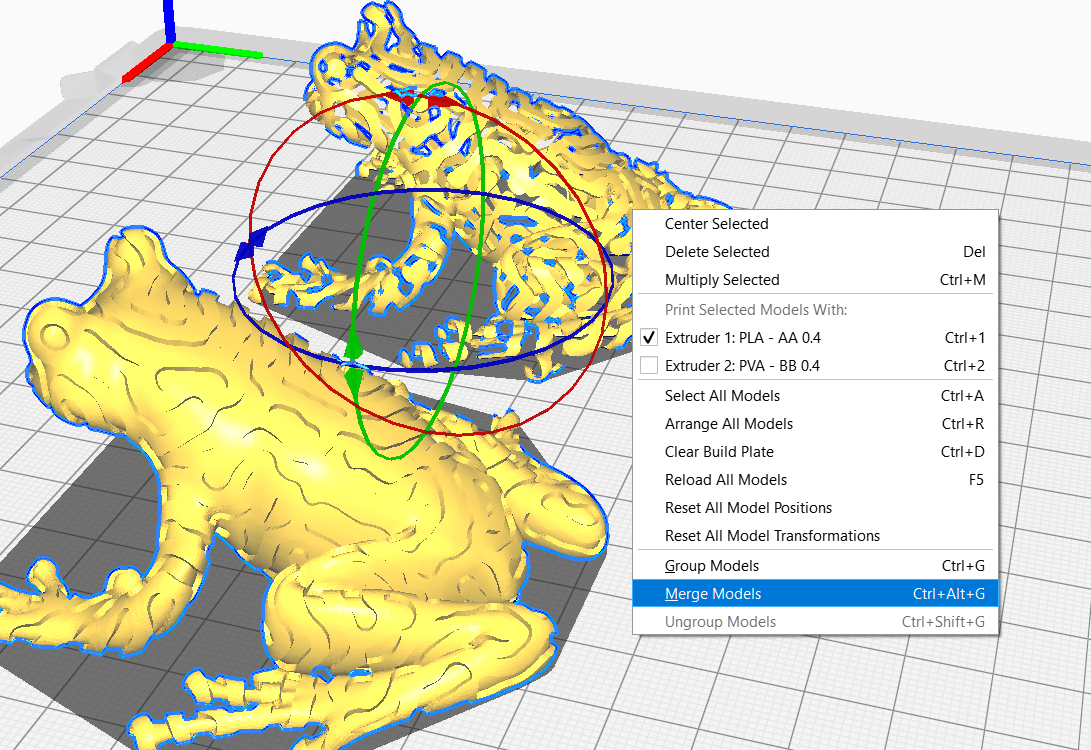
This makes the frog complete again, so you don’t see the lines anymore, but the slicer ‘remembers’ the extruder you assigned to each of the underlying submodels.
If you now slice the model, the slicer sends commands to your 3D printer causing it to switch from one extruder to the other during each layer. Bear in mind that this is more time-consuming than using a single extruder, so take this into account when planning your print.
Single extruder
If you’re planning to make a multicoloured print and you are able to design the model yourself, the most sophisticated result can be achieved with a dual extruder. However, there are still options for making a model in multiple colours when you have a 3D printer with only one extruder. Printing models for students with low vision using one extruder gives you the possibility of creating models with contrasting colours.
Multipart model
The most straight-forward method of making a 3D print with multiple colours is when your model consists of multiple STL files. In this way, you can make , switching to different coloured filaments between prints.
This method would enable you to print the rubbish bin shown below:
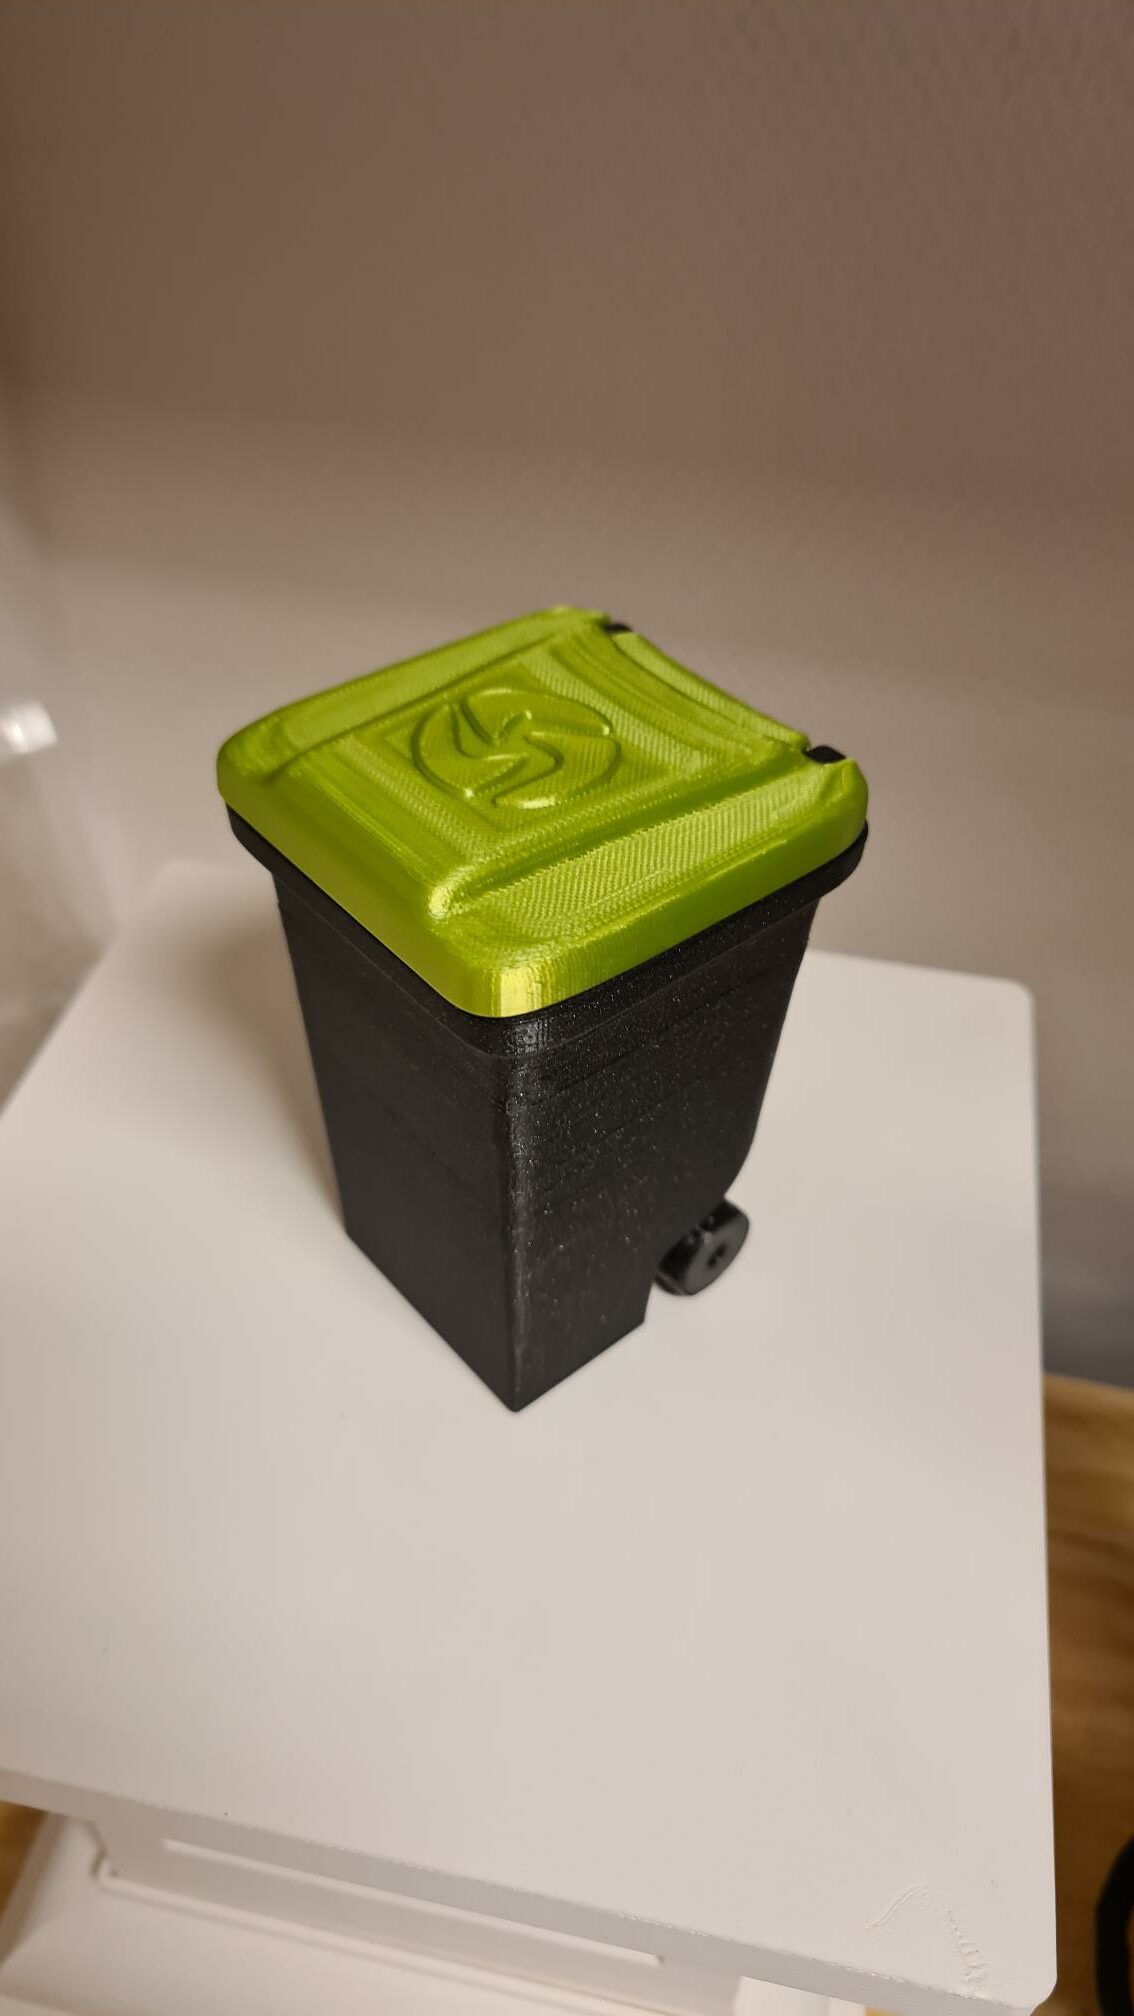
This is achieved by making a print for the lid with green filament and a separate print with black filament, and gluing them together afterwards.
Pause at height
You can also switch to different colours of filament mid-print. The disadvantage of using one extruder is that you can only change colour in the z-direction, whilst with a dual extruder you can have a difference in colour in all 3 directions (x, y and z).
Most 3D printers have a pause function, enabling you to stop the print and restart it at a later point. In the time between you can switch the filament. Theoretically, you can decide during a print if you want to stop at a random point and switch the filament. This method is possible but you cannot be very precise and pause at the exact layer height or model height that you would like to. Also, it requires you to stay with your 3D printer until you pause it. And of course, if you walk away and you forget about the print or you are too late, then you will have a single colour print.
Therefore, most slicers have a ‘pause at height’ function or something similar. This allows you to pause the printing process at an exact layer height, allowing you to switch the filament so you do not have to worry about being around the printer at a certain moment.
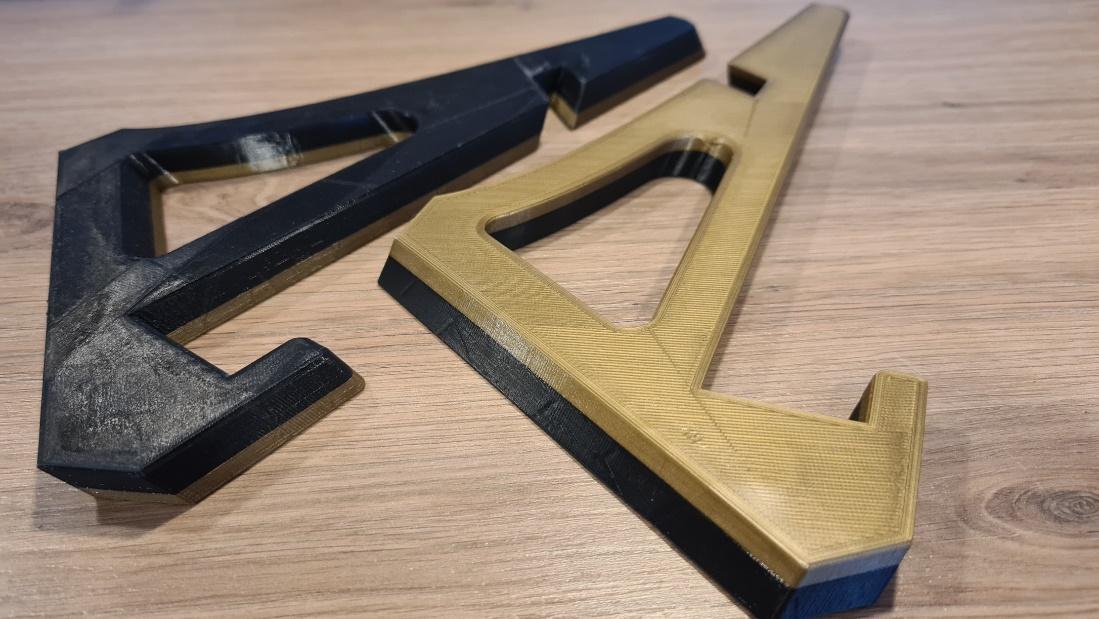
An example of a two-piece bookstand in gold and black, is shown below.
Hardware add-ons
Besides the options of using a single or dual extruder, there are different hardware add-ons that you can use for multicolour – or even multi-material – printing. An example of this is the Palette 3 pro.
You can hook up different filaments to the box and this makes your single extruder printer behave like a printer with 2, 3 or even up to 8 extruders.
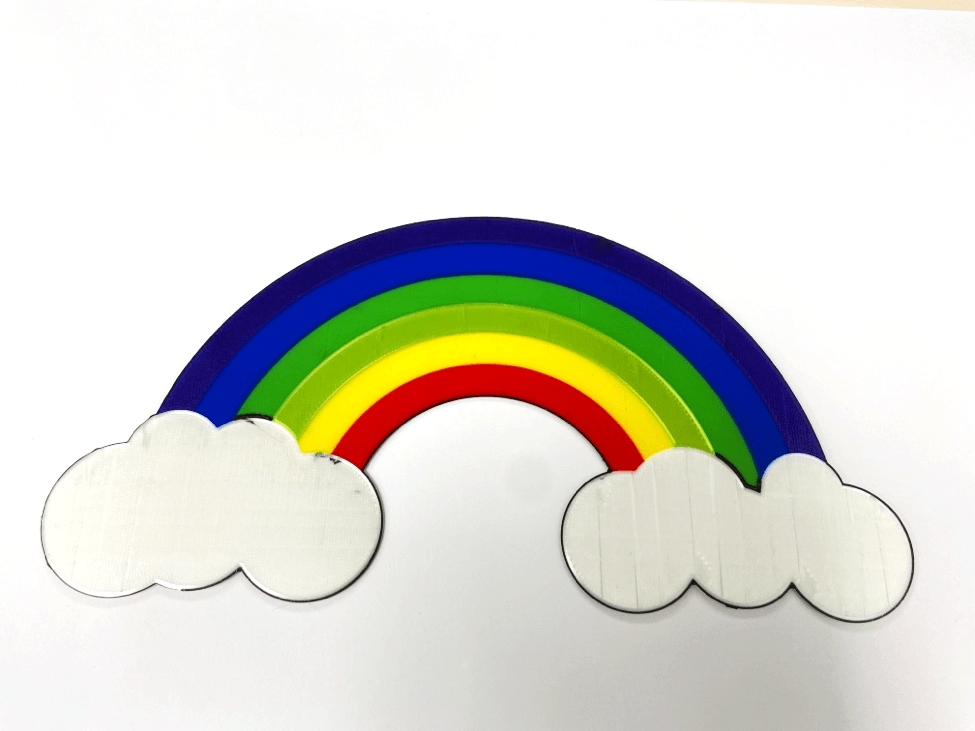
You can then make prints like this:
Written by: Evert Rasing