Table of Contents
Introduction
Depending on the geometry and the intended purpose, a model may need to be able to be unfolded by a student. This is particularly the case when something inside the model is to be explored.
Drawings for sighted students may have transparent outer walls, so that, for example, the height of a pyramid (geometry) can be drawn inside. However, this does not work for visually impaired students. In the example of the pyramid with transparent outer walls, a visually impaired student can neither touch nor see the height of the pyramid. Instead, it has proven practical to design foldable models for visually impaired students. The student can unfold the model into two or more parts so that the height can be felt inside.
Note: Even though this article is called “foldable model”, the model does not necessarily have to be foldable. “Foldable” is used as an umbrella term for models that can be opened up and explored inside. For this, it is not essential that there is an axis around which a part is hinged. The two halves in the example of the pyramid used above could also be separated from each other in order to explore inside.
Implementation techniques
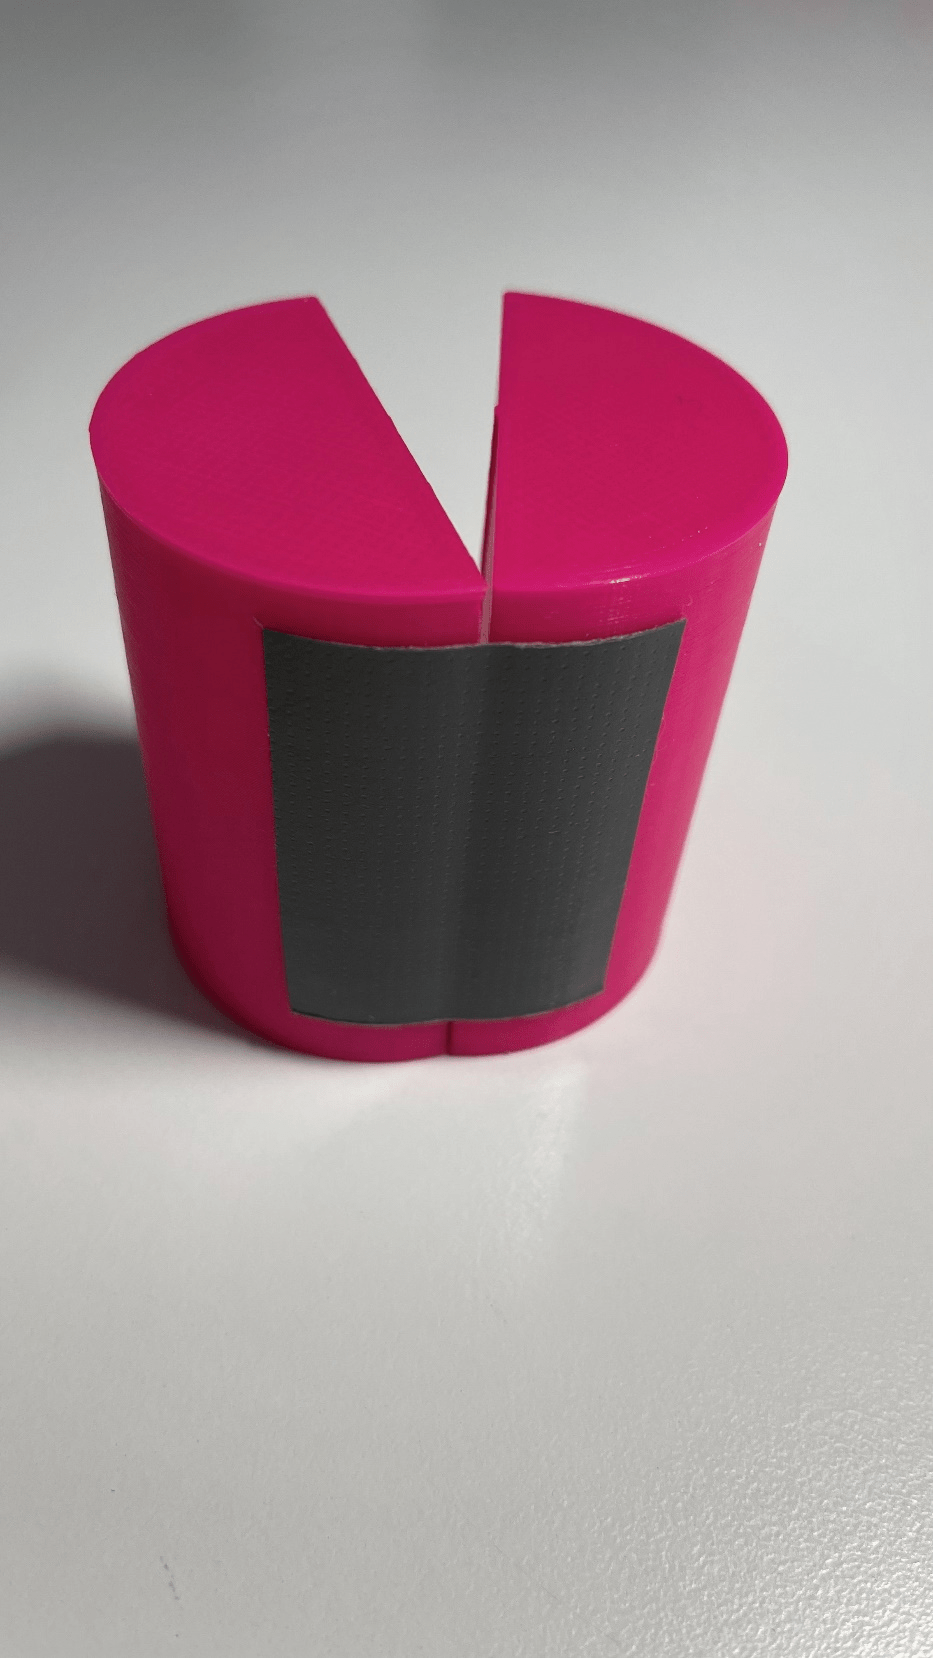
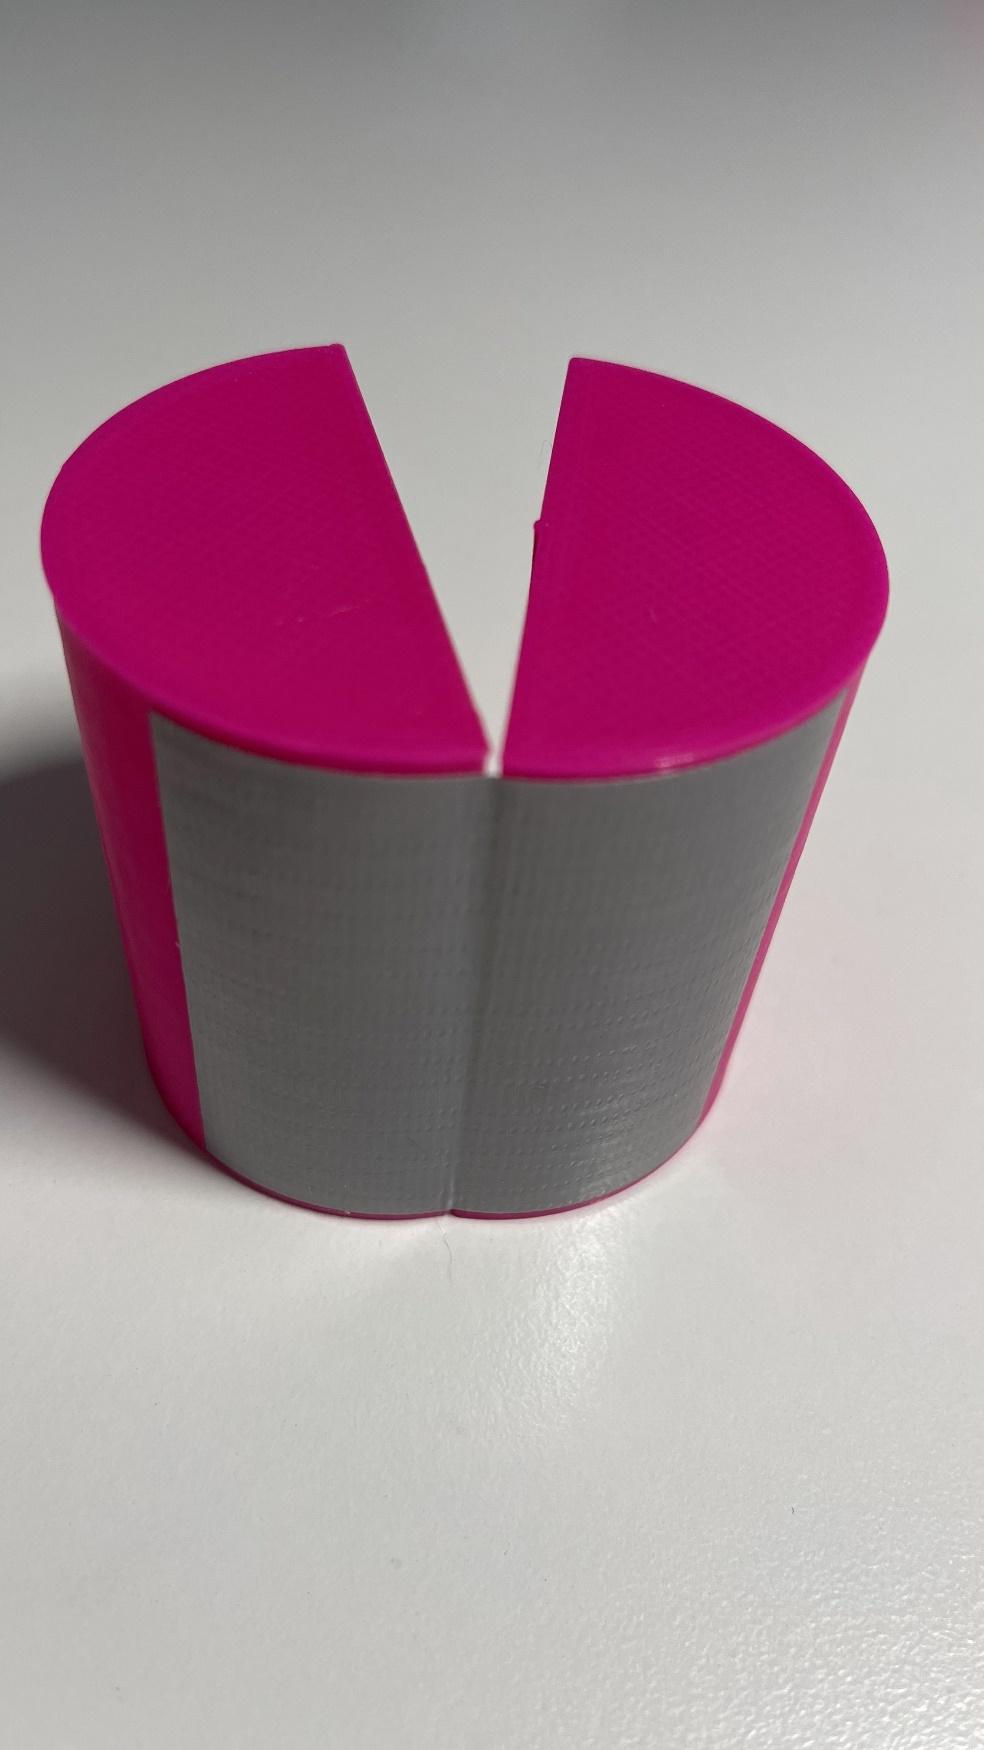
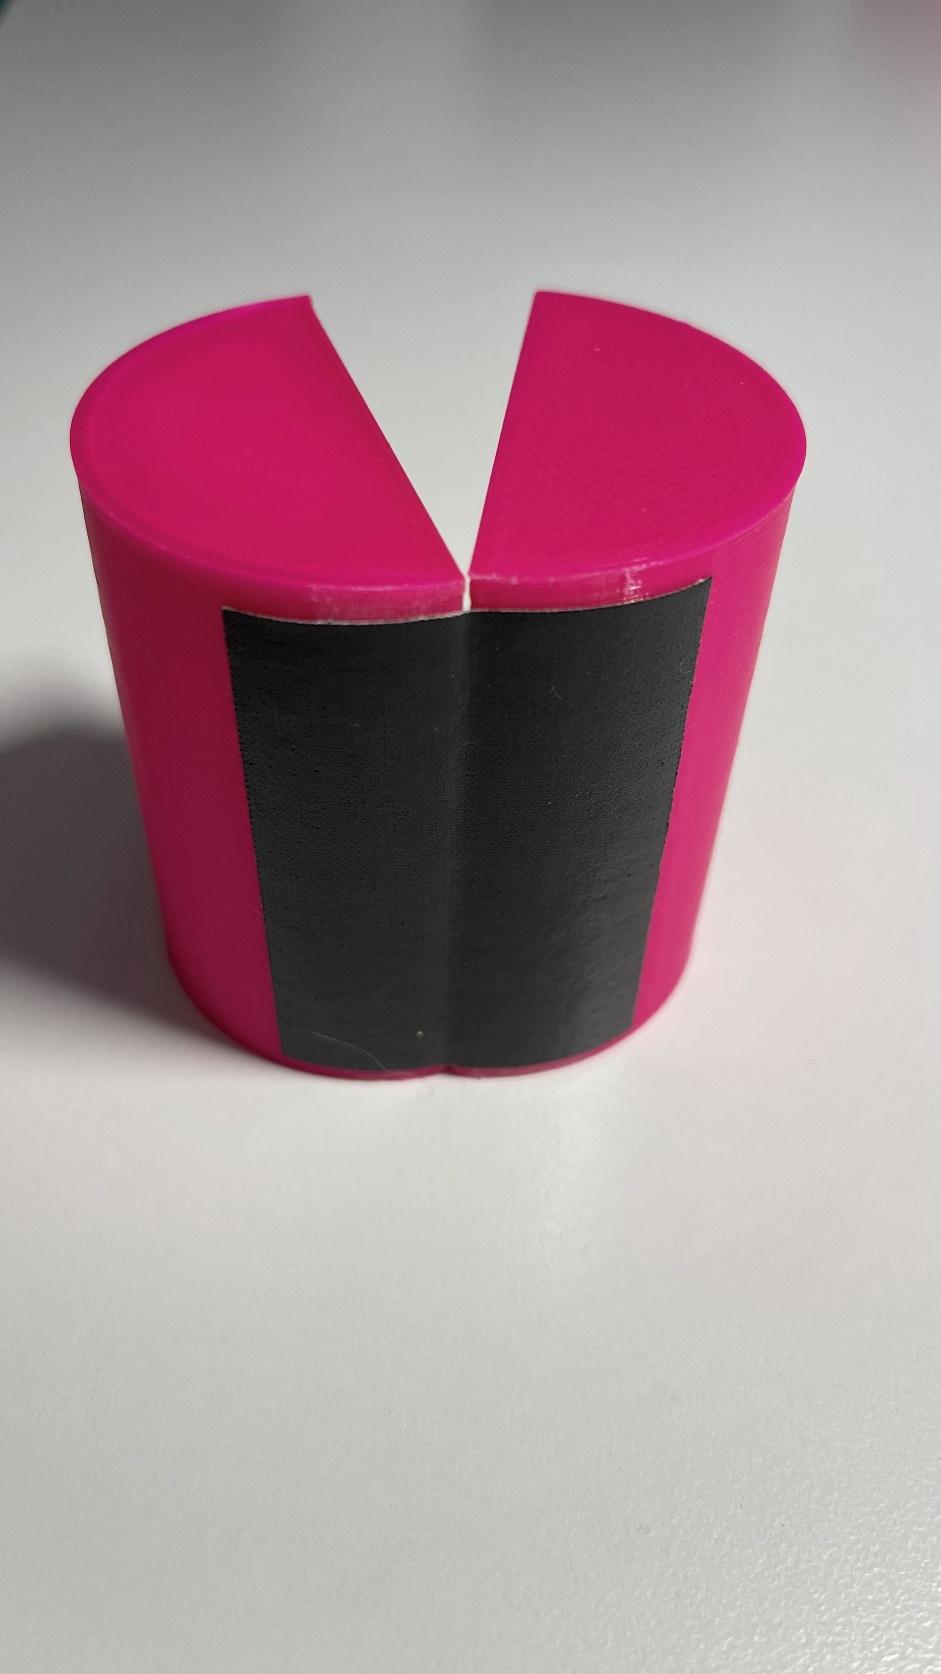
Adhesive tape
If a model has been printed in two parts so that it can be opened to explore the inside, the parts can be connected with tape. In this case, a strip of tape can be stuck on the outside of the model along the axis of rotation. If the right tape is chosen, the adhesive effect is strong enough for the usual filaments. The main advantage of this technique is that it is cost-efficient, easy and quick to implement. Another advantage is that the adhesive tape can be removed and the parts can be handled without any joining technique. The adhesive tape also doesn’t apply much material and experience has shown that students are not distracted by it. The disadvantage of this technique is that it is not very durable or stable and may need to be replaced after some time.
Advice: Do not use masking tape, insulating tape or similar. The tape used should be more like duct tape. This is sold under different names by some manufacturers and should be available throughout Europe.
Recommended adhesive tapes
T-REX® TAPE
T-REX® TAPE has extreme adhesive strength but is not particularly flexible. However, this can also be an advantage, as the model does not unfold too easily on its own when being handled.
The tesa® Ultra Power Extreme is also suitable, as its properties are very similar.
Tesa extra Power® Universal
This duct tape has good adhesive strength and is quite flexible. In addition, the tape has a very good cost-performance ratio.
Kip 325 tape is also suitable, as its properties are very similar to tesa extra Power® Universal.
tesa extra Power® Perfect fabric tape
If the above-mentioned tapes are not available, tesa extra Power® Perfect fabric tape can also be used. The adhesive strength on PLA is not quite as high as tesa extra power or T-rex tape, but it is still sufficient. This tape is probably the most expensive.
No connection
For didactic reasons, it may also make sense to leave the two parts disconnected so that the students can explore them individually. The disadvantage, however, is that the students might not get the desired impression of the model as a whole, as the two parts might keep moving. This is where the technique described below may help.
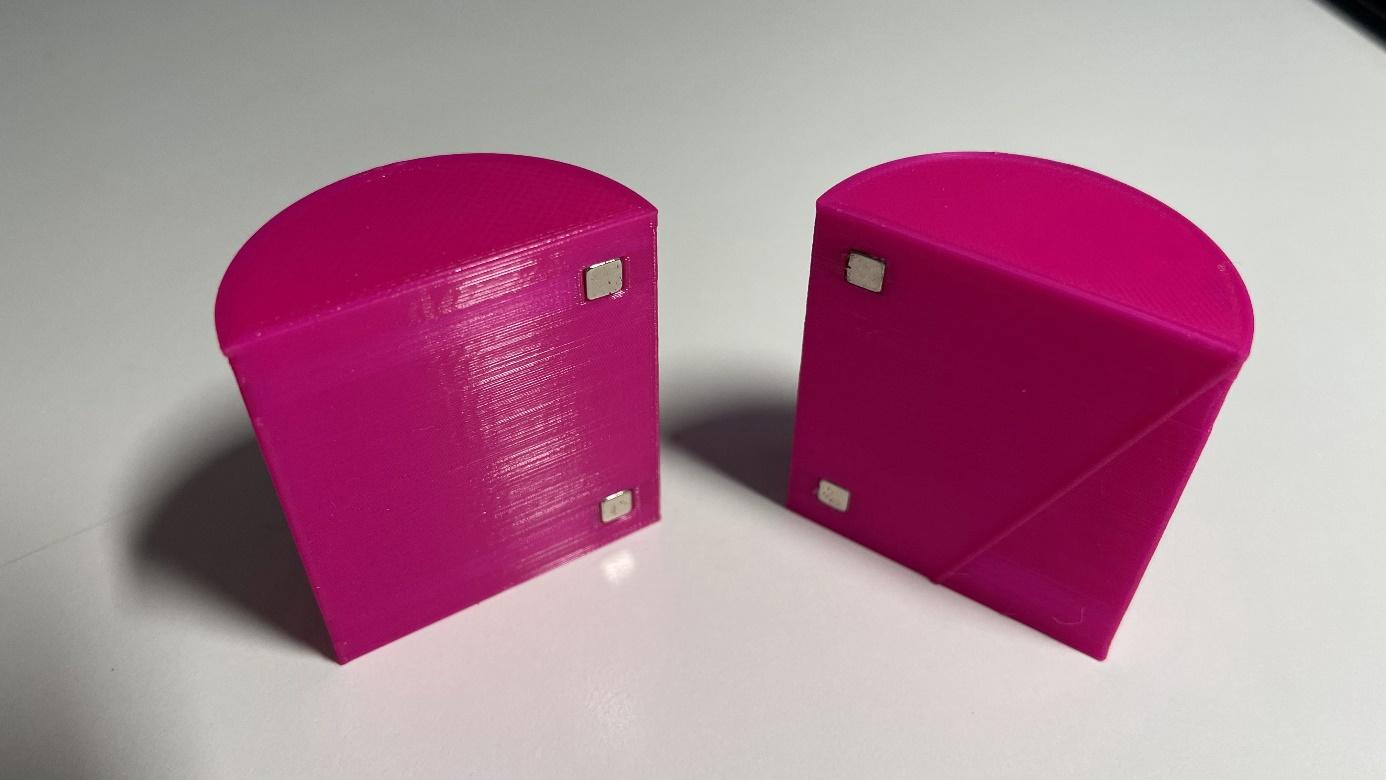
Magnets
The advantages of the “no connection” technique also apply to the solution with magnets, which are installed in both parts of the model. The advantage of this technique is that the two parts are more or less securely connected to each other when assembled, depending on the choice of magnet. In this way, the model can also be easily explored as a whole.
The disadvantage of this technique is that it does not allow for a folding function which can be useful for educational purposes. With folding, it is always clear how the model is constructed and how the different parts fit together.
Another disadvantage is that misaligned magnets can be felt and are therefore distracting under certain circumstances. It is also important to ensure that the magnets do not protrude. The recesses for the magnets should be planned during the model’s design process in the 3D software. Depending on the fit, the magnets will be attached by pressing them in or gluing them on the model.
It is difficult to give a general recommendation regarding the type or shape of magnet as the choice depends on the size and geometry of the model. Neodymium magnets are the best choice in most cases.
However, if the magnets become detached from the model, they can be dangerous. As they can be swallowed, they should not be used with small children or children with complex needs.
As far as the shape is concerned, cube-shaped magnets have been proven to work well, as they cannot twist even without adhesive. Alternatively, disc magnets could also be considered as they also work well.
The advantage of cylindrical magnets is that they are easy to obtain and slightly cheaper in price. They are also available in many different sizes and strengths.
The required cavities can usually be printed in any spatial direction without support. Cylindrical magnets with a small cross-section but a slightly greater height have proven to be useful.
If the connection is made with 2 magnets per component, the following magnets have proven to work well in tests:
- Cube with edge length 5mm (adhesive force approx. 1.1kg)
- Disc magnet Ø 6mm, height 3mm, (adhesive force approx. 990g)
Magnets in combination with ferrous filament
Magnets can also be combined with ferrous objects. For 3D printing, this means that ferrous filament can be printed into objects and used later with magnets. In this case, it can be an advantage that the object in question is attracted regardless of the polarity of the magnet. This is useful, for example, where both sides of an object are used, as shown in the example below.
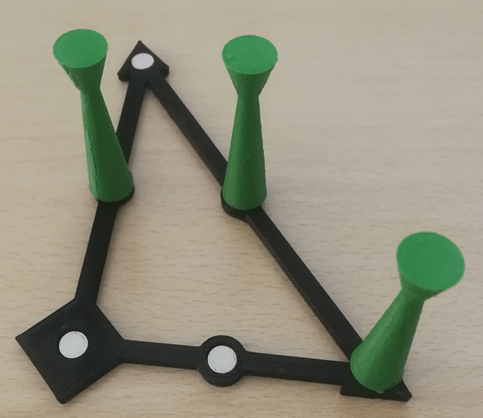
The markers printed with ferrous filament can adhere to different parts of the triangle, i.e. in the corners or along the sides. What is not shown is that this also works from the back of the triangle.
Velcro dots
Velcro dots can be used as an alternative to magnets. These are self-adhesive and can be stuck directly onto the model. It is important that they are of good quality so that they do not peel off. We have had good experiences with Velcro dots from tesa. These have a diameter of 16mm. Designing a small cavity makes sense so that the dots are less easy to peel off.
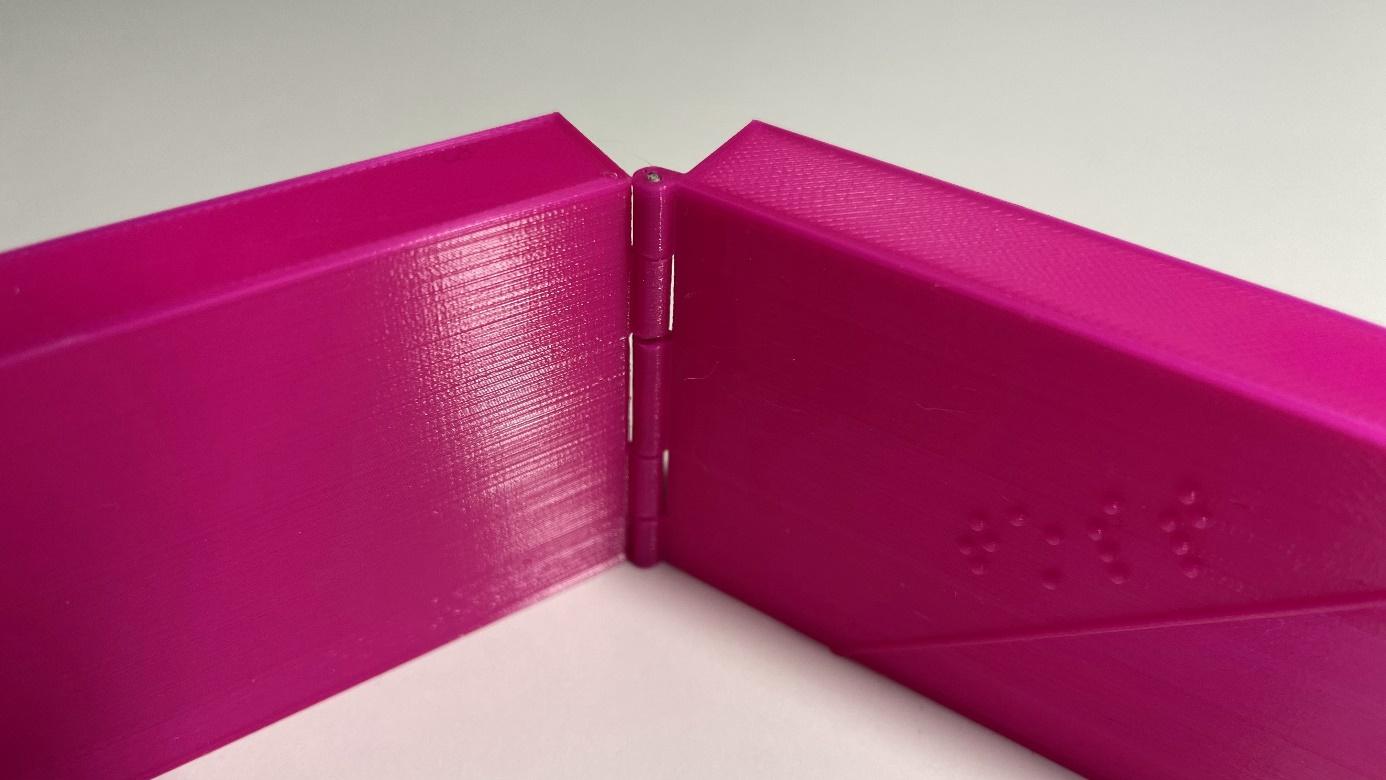
Hinges
Constructing a hinge when designing the model in the software is technically possible but it is a challenging solution. Various options can be found on the internet on how to construct hinges for 3D printing. Each solution has advantages and disadvantages. Some hinges move very well and are durable, but are challenging to design. Others, on the other hand, have mechanical disadvantages but are very easy to print.
Careful consideration should therefore be given as to whether printing a hinge is the best option to make a foldable model. Also bear in mind that printed hinges do not last long and are demanding in both construction and printing. In addition, it should also be taken into account that the hinges could be distracting components when exploring the model.
Tests have shown that a printed axle made of PLA often breaks off too easily. It is better to use a metal axle that is glued in place after printing. Here, for example, a nail can be used because its size can be measured in advance and the hinge can then be designed to fit. The construction of a hinge is explained in detail in article 4.7.1. Other more durable materials could be also be used for stronger/bigger hinges.
Use of flexible filament
Last but not least, an object can also be printed using flexible filament, which allows it to be folded afterwards.
Written by: Tobias Wolfsteiner